> ## Documentation Index
> Fetch the complete documentation index at: https://explore.airia.com/llms.txt
> Use this file to discover all available pages before exploring further.
# Setting Up AWS STS Connector for Airia
## Overview
Use this guide to grant Airia secure, temporary access to AWS resources in your account (for example, Amazon Bedrock models) without sharing long-lived AWS credentials.
Airia uses AWS Security Token Service (STS) `AssumeRole` with an External ID. You'll create an IAM role in your AWS account that trusts Airia to assume it; Airia exchanges that trust for short-lived credentials whenever it needs to call AWS on your behalf.
***
## Prerequisites
Before you begin, ensure you have:
* [ ] **AWS account access** with permission to create IAM roles (`iam:CreateRole`, `iam:PutRolePolicy`, `iam:AttachRolePolicy`)
* [ ] **Airia Admin user** with permission to create OAuth connectors
* [ ] **AWS region** where your target resources live (e.g., `us-east-1`)
***
## Step 1: Start the connector in Airia
1. In Airia, go to **Settings** → **Ecosystem** → **App Connections** → **Available**
2. Choose **AWS STS**
3. The form will display a **Trust Policy** and an **External ID**. Leave this browser tab open — you'll need both in the next steps.
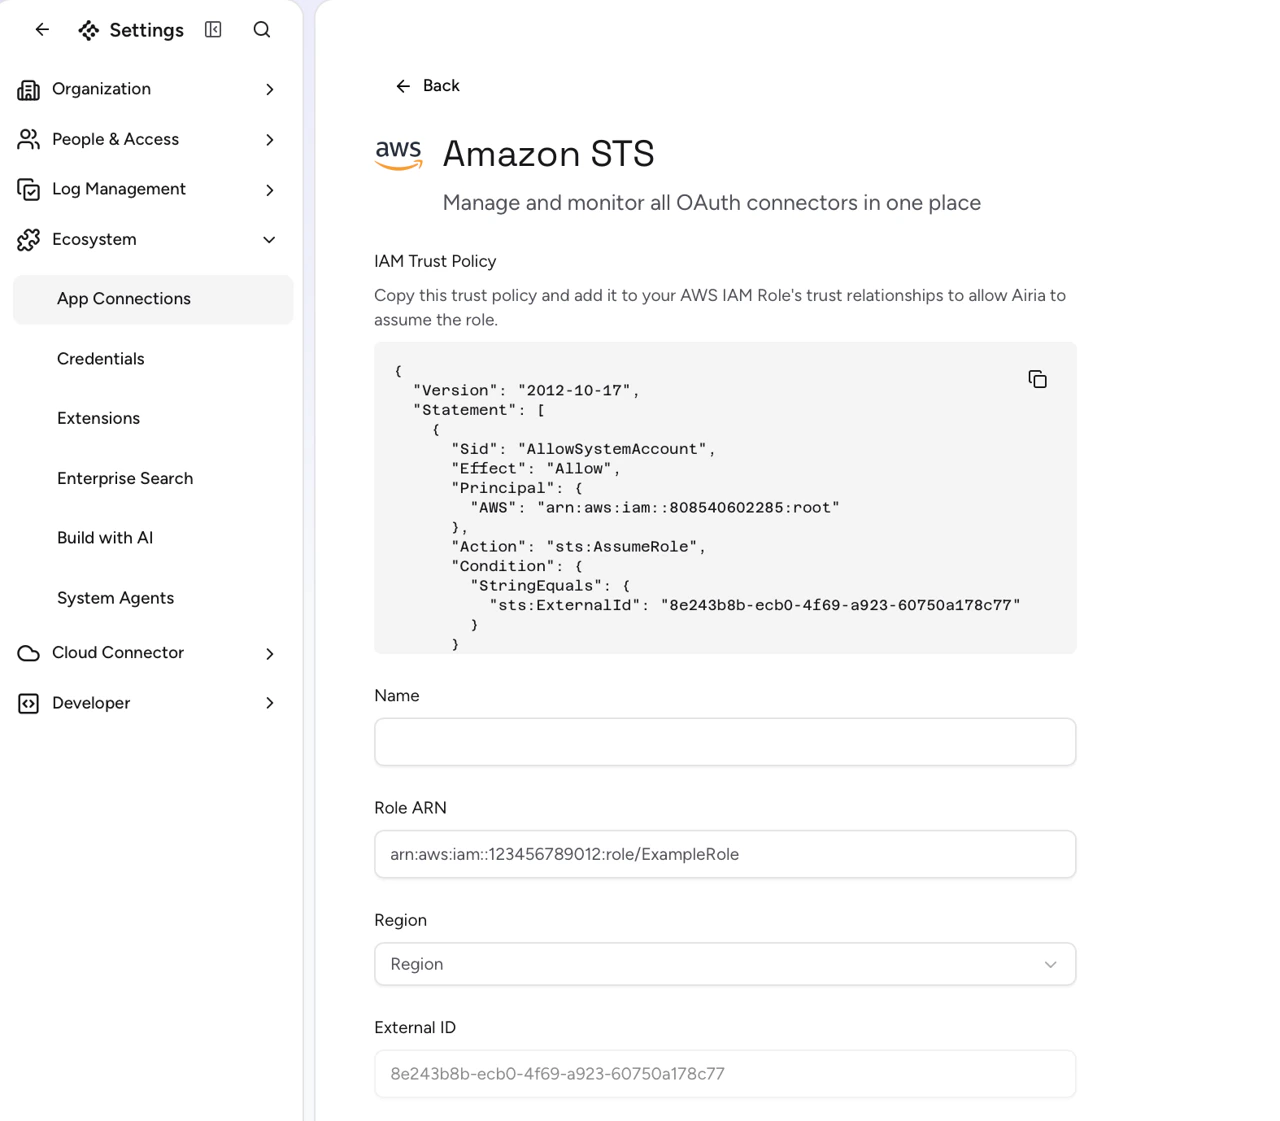 **Do not refresh this page until you finish Step 4.** The External ID is regenerated on each page load, and a fresh one won't match the IAM role you're about to create.
***
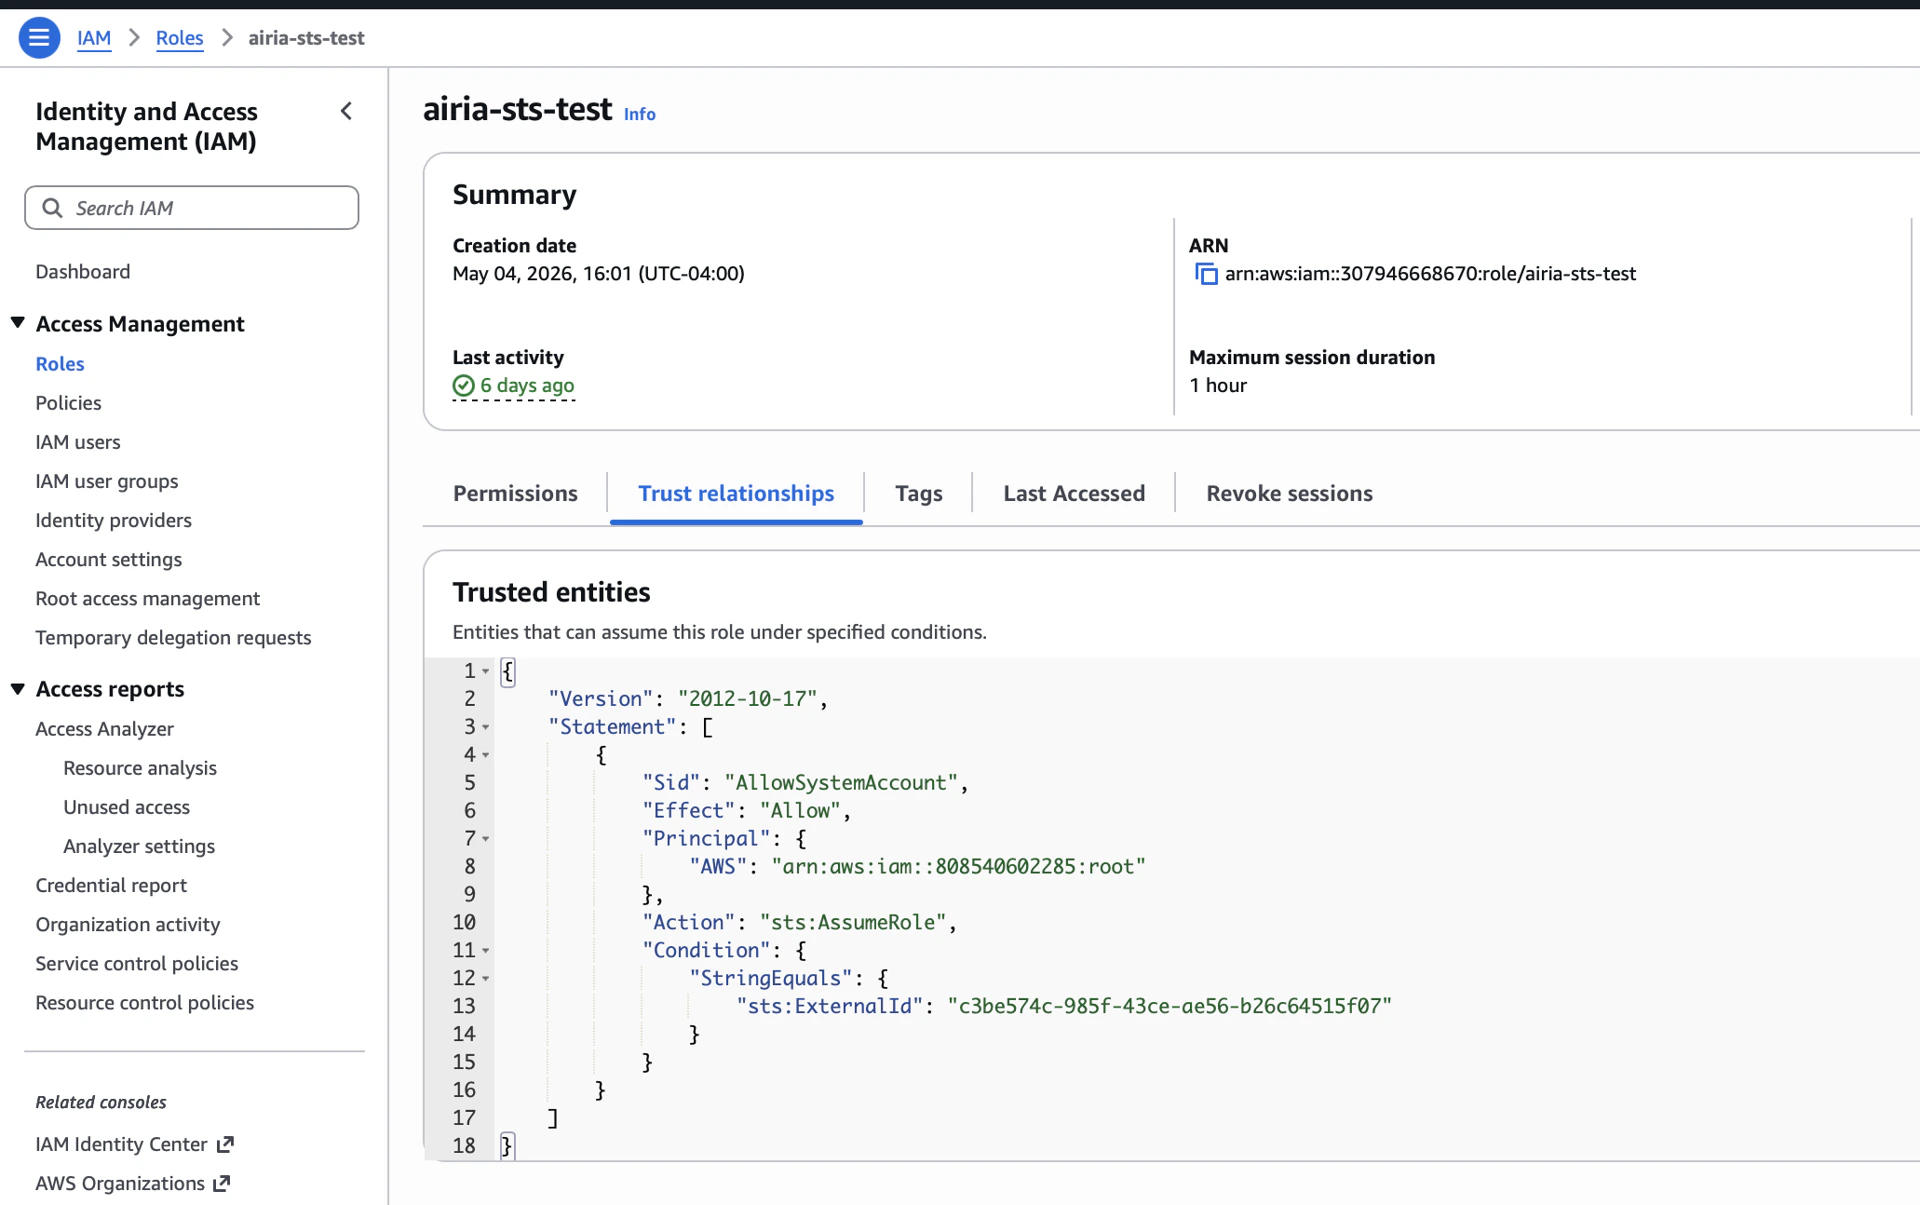
## Step 2: Create the IAM role in AWS
1. Sign in to the AWS Console and open **IAM** → **Roles** → **Create role**.
2. **Trusted entity type**: select **Custom trust policy**.
3. Copy the Trust Policy from Airia and paste it into the policy editor, replacing the default JSON. It will look like:
```json theme={null}
{
"Version": "2012-10-17",
"Statement": [
{
"Sid": "AllowSystemAccount",
"Effect": "Allow",
"Principal": { "AWS": "arn:aws:iam::808540602285:root" },
"Action": "sts:AssumeRole",
"Condition": {
"StringEquals": { "sts:ExternalId": "" }
}
}
]
}
```
4. Click **Next**.
**Do not refresh this page until you finish Step 4.** The External ID is regenerated on each page load, and a fresh one won't match the IAM role you're about to create.
***
## Step 2: Create the IAM role in AWS
1. Sign in to the AWS Console and open **IAM** → **Roles** → **Create role**.
2. **Trusted entity type**: select **Custom trust policy**.
3. Copy the Trust Policy from Airia and paste it into the policy editor, replacing the default JSON. It will look like:
```json theme={null}
{
"Version": "2012-10-17",
"Statement": [
{
"Sid": "AllowSystemAccount",
"Effect": "Allow",
"Principal": { "AWS": "arn:aws:iam::808540602285:root" },
"Action": "sts:AssumeRole",
"Condition": {
"StringEquals": { "sts:ExternalId": "" }
}
}
]
}
```
4. Click **Next**.
 ***
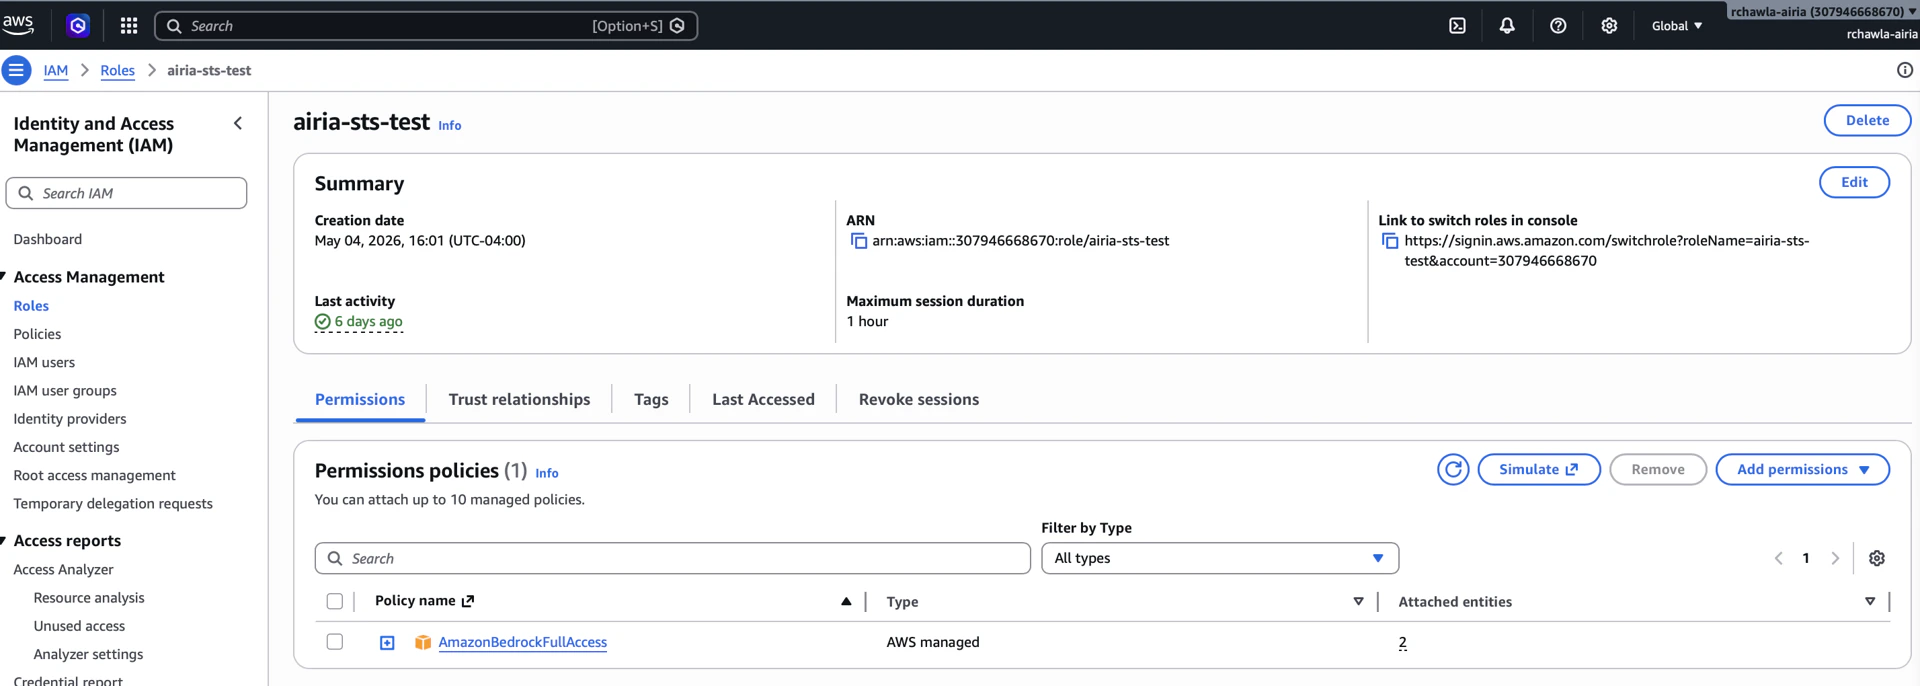
## Step 3: Attach permissions to the role
Grant the role only what Airia needs to do on your behalf. The most common case is invoking Bedrock models.
### Bedrock (typical)
In the **Add permissions** step, attach the AWS-managed policy **`AmazonBedrockFullAccess`** (or create a custom policy scoped to specific model ARNs for tighter control).
### Tighter scoping (recommended for production)
Create a custom policy that only allows the specific Bedrock actions and model resources you intend to expose. For example:
```json theme={null}
{
"Version": "2012-10-17",
"Statement": [{
"Effect": "Allow",
"Action": [
"bedrock:InvokeModel",
"bedrock:InvokeModelWithResponseStream",
"bedrock:ListFoundationModels"
],
"Resource": "*"
}]
}
```
***
## Step 4: Finish the role and copy its ARN
1. **Role name**: choose something descriptive, e.g. `airia-bedrock-access`.
2. Click **Create role**.
3. Open the role you just created and copy its **ARN**. It will look like:
```
arn:aws:iam::123456789012:role/airia-bedrock-access
```
***
## Step 3: Attach permissions to the role
Grant the role only what Airia needs to do on your behalf. The most common case is invoking Bedrock models.
### Bedrock (typical)
In the **Add permissions** step, attach the AWS-managed policy **`AmazonBedrockFullAccess`** (or create a custom policy scoped to specific model ARNs for tighter control).
### Tighter scoping (recommended for production)
Create a custom policy that only allows the specific Bedrock actions and model resources you intend to expose. For example:
```json theme={null}
{
"Version": "2012-10-17",
"Statement": [{
"Effect": "Allow",
"Action": [
"bedrock:InvokeModel",
"bedrock:InvokeModelWithResponseStream",
"bedrock:ListFoundationModels"
],
"Resource": "*"
}]
}
```
***
## Step 4: Finish the role and copy its ARN
1. **Role name**: choose something descriptive, e.g. `airia-bedrock-access`.
2. Click **Create role**.
3. Open the role you just created and copy its **ARN**. It will look like:
```
arn:aws:iam::123456789012:role/airia-bedrock-access
```
 ***
## Step 5: Complete the connector in Airia
Back in the Airia browser tab you left open in Step 1:
1. Paste the **Role ARN** into the Role ARN field.
2. Select the **Region** where your AWS resources live.
3. Give the connector a **Name**.
4. Click **Save**.
Airia is now configured to call AWS on your behalf using temporary STS credentials.
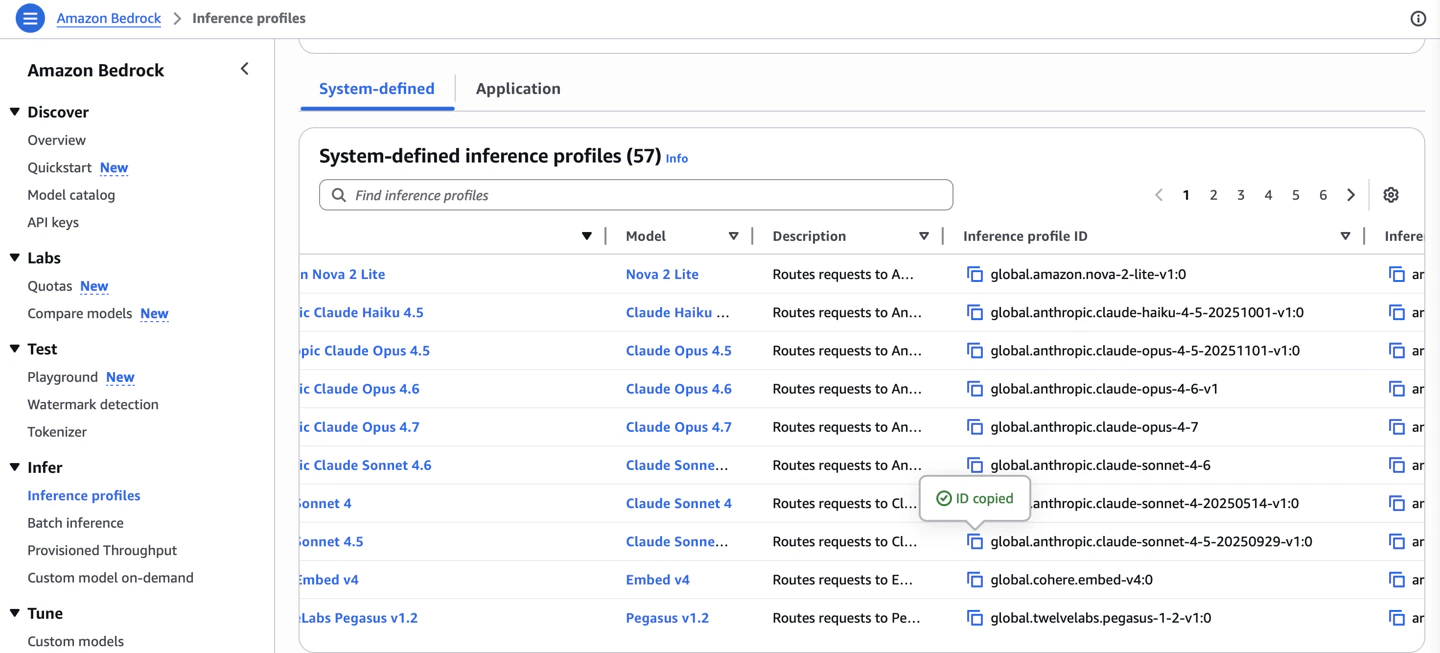
### Cross-Region Inference (for Custom models)
When configuring a Custom model (such as Claude or Llama), you'll need a **Cross-Region Inference ID**, and copy the ID in as the **Model ID** on the model configuration dialog.
To find it in the Bedrock console:
1. AWS Console → **Amazon Bedrock** (make sure you're in your target region, e.g. `us-east-1`)
2. In the left sidebar, expand **Infer** and click **Cross-region inference**
3. You'll see a table of inference profiles. The column you want is **Inference profile ID** — that's the value to copy into Airia.
***
## Step 5: Complete the connector in Airia
Back in the Airia browser tab you left open in Step 1:
1. Paste the **Role ARN** into the Role ARN field.
2. Select the **Region** where your AWS resources live.
3. Give the connector a **Name**.
4. Click **Save**.
Airia is now configured to call AWS on your behalf using temporary STS credentials.
### Cross-Region Inference (for Custom models)
When configuring a Custom model (such as Claude or Llama), you'll need a **Cross-Region Inference ID**, and copy the ID in as the **Model ID** on the model configuration dialog.
To find it in the Bedrock console:
1. AWS Console → **Amazon Bedrock** (make sure you're in your target region, e.g. `us-east-1`)
2. In the left sidebar, expand **Infer** and click **Cross-region inference**
3. You'll see a table of inference profiles. The column you want is **Inference profile ID** — that's the value to copy into Airia.
 ***
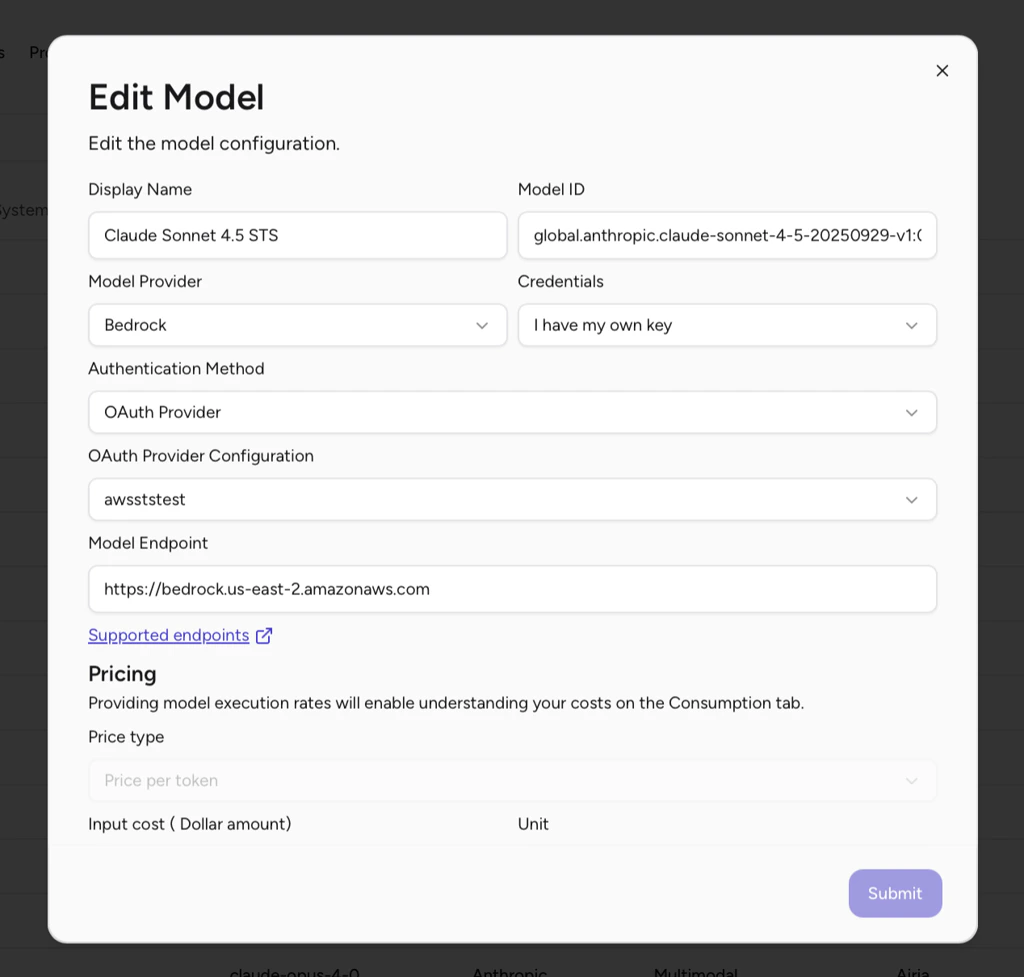
## Step 6: Add it to a Model
The simplest end-to-end test is to use the connector — for example, register a Bedrock model in **Model Library** → **Add Model**, select **OAuth**, and pick this connector as the authentication source.
***
## Step 6: Add it to a Model
The simplest end-to-end test is to use the connector — for example, register a Bedrock model in **Model Library** → **Add Model**, select **OAuth**, and pick this connector as the authentication source.
 Once saved, add the model to an Agent and send a simple greeting message. If the model responds, the end-to-end connection works.
***
## Optional: Confirm the AssumeRole event in AWS
You can also verify the call landed in your AWS account:
* **CloudTrail → Event history** (region `us-east-1`), filter by **Event name = `AssumeRole`**. Look for an event with:
* `requestParameters.roleArn`: your role's ARN
* `requestParameters.externalId`: the External ID Airia gave you
CloudTrail can lag 5–15 minutes.
* **IAM → Roles → `airia-bedrock-access` → Last activity**: updates within a few hours of use.
Once saved, add the model to an Agent and send a simple greeting message. If the model responds, the end-to-end connection works.
***
## Optional: Confirm the AssumeRole event in AWS
You can also verify the call landed in your AWS account:
* **CloudTrail → Event history** (region `us-east-1`), filter by **Event name = `AssumeRole`**. Look for an event with:
* `requestParameters.roleArn`: your role's ARN
* `requestParameters.externalId`: the External ID Airia gave you
CloudTrail can lag 5–15 minutes.
* **IAM → Roles → `airia-bedrock-access` → Last activity**: updates within a few hours of use.