> ## Documentation Index
> Fetch the complete documentation index at: https://explore.airia.com/llms.txt
> Use this file to discover all available pages before exploring further.
# Setting Up Google Cloud Console OAuth App
## Overview
This guide walks you through creating an OAuth application in Google Cloud Console for use with Airia. This enables secure integration with Google Workspace Tools including Gmail, Google Calendar, Google Drive, Google Docs, and Google MCP Servers.
## Prerequisites
Before you begin, ensure you have:
* [ ] **Google Workspace admin access** - Or a Google account with permissions to create Cloud projects
* [ ] **Active Google Cloud account** - Free tier is sufficient
* [ ] **Airia callback URLs** - Available in the Airia platform OAuth configuration page
If you're using Google Workspace for your organization, you may need admin approval to create Cloud projects or configure OAuth apps. Check with your IT administrator if you encounter permission issues.
***
## Step 1: Access Google Cloud Console
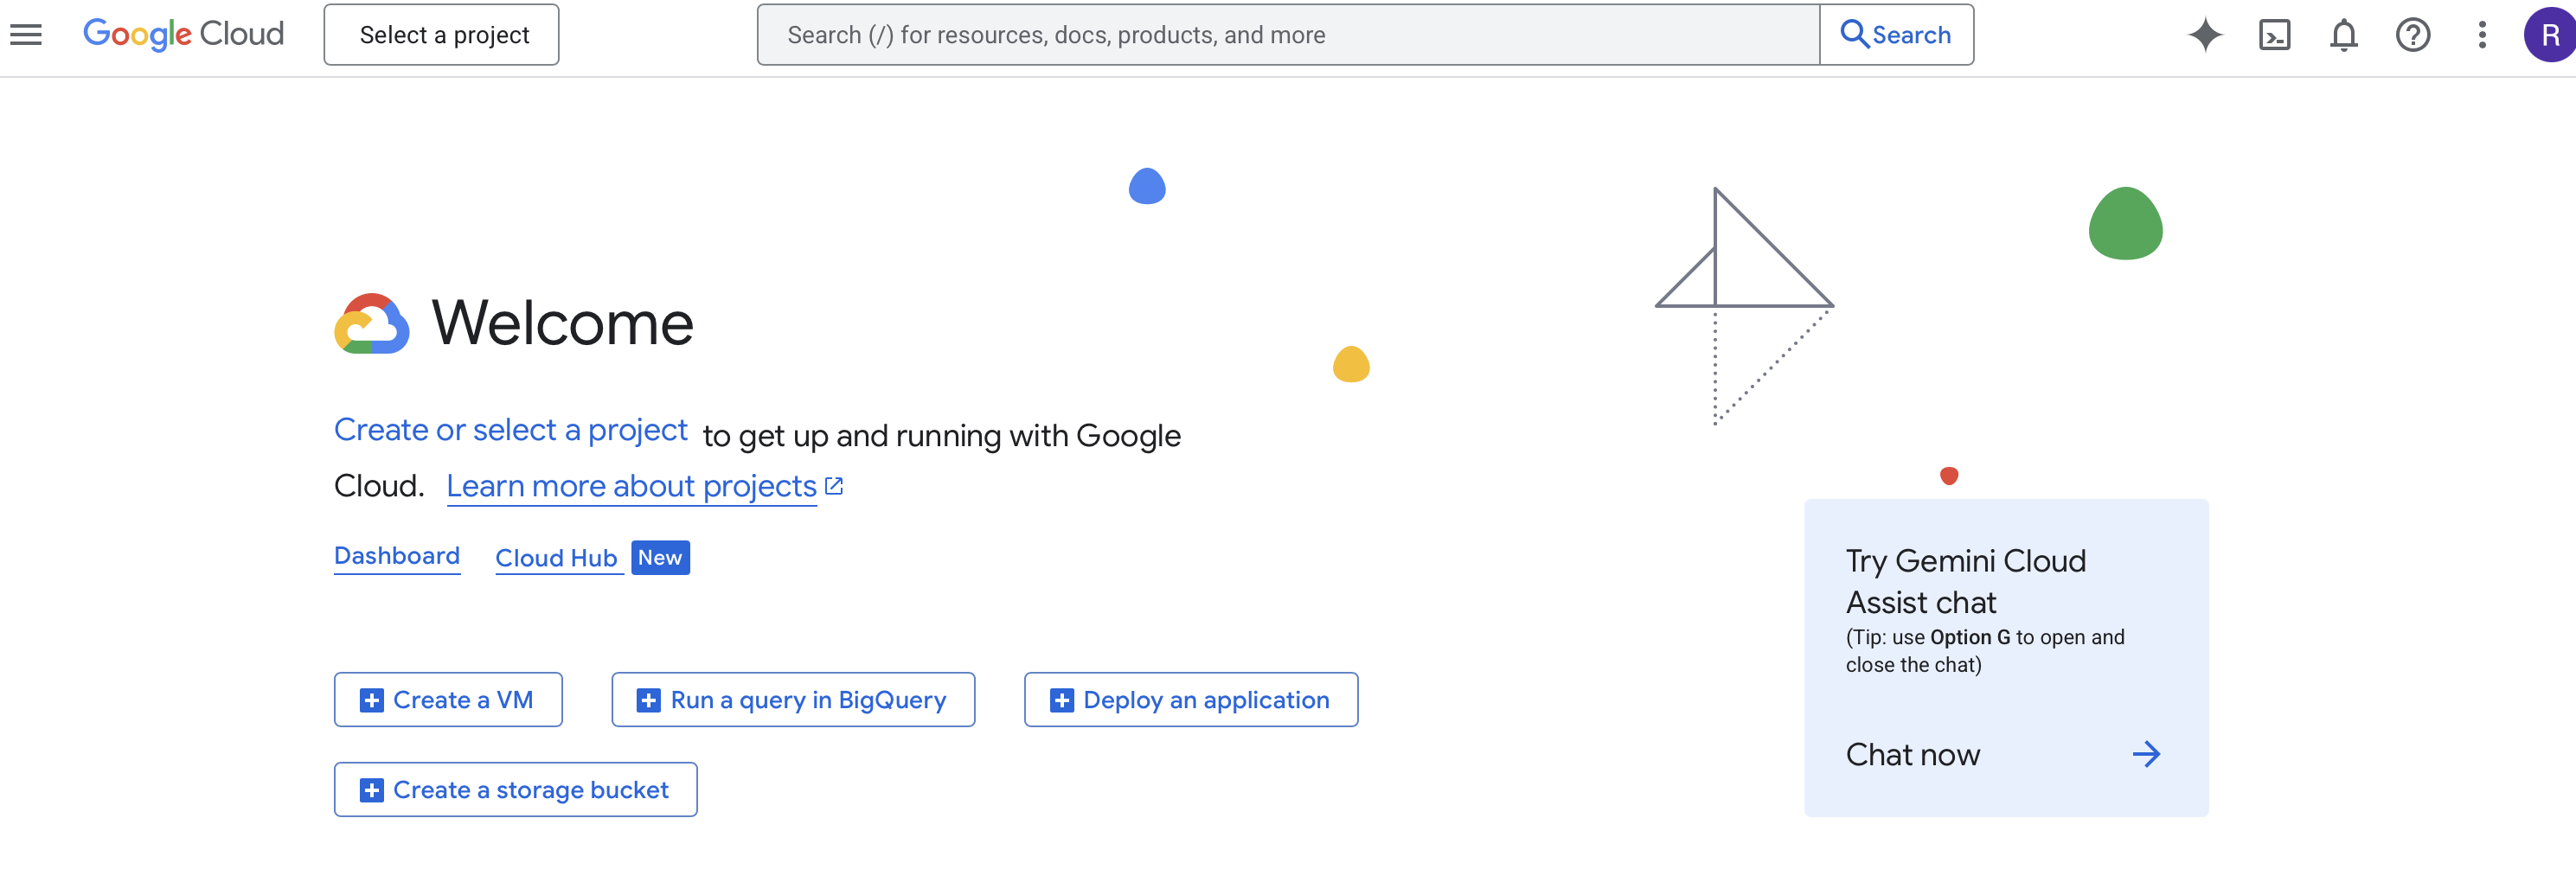
1. Navigate to [Google Cloud Console](https://console.cloud.google.com)
2. Sign in with your Google account (preferably your organizational account)
3. If this is your first time, accept the Terms of Service
 ***
## Step 2: Create a New Project
1. Click the **project selector** dropdown at the top of the page (next to "Google Cloud")
2. In the dialog, click **NEW PROJECT** in the top-right corner or select an existing project
If creating a new project,
3. Fill in the project details including the Project name and organization
4. Click **CREATE**
5. Use the project selector to switch to your new project
**Using an Existing Project**
If you prefer to use an existing Google Cloud project, you can skip project creation and select your existing project instead.
***
## Step 3: Enable Required Google APIs
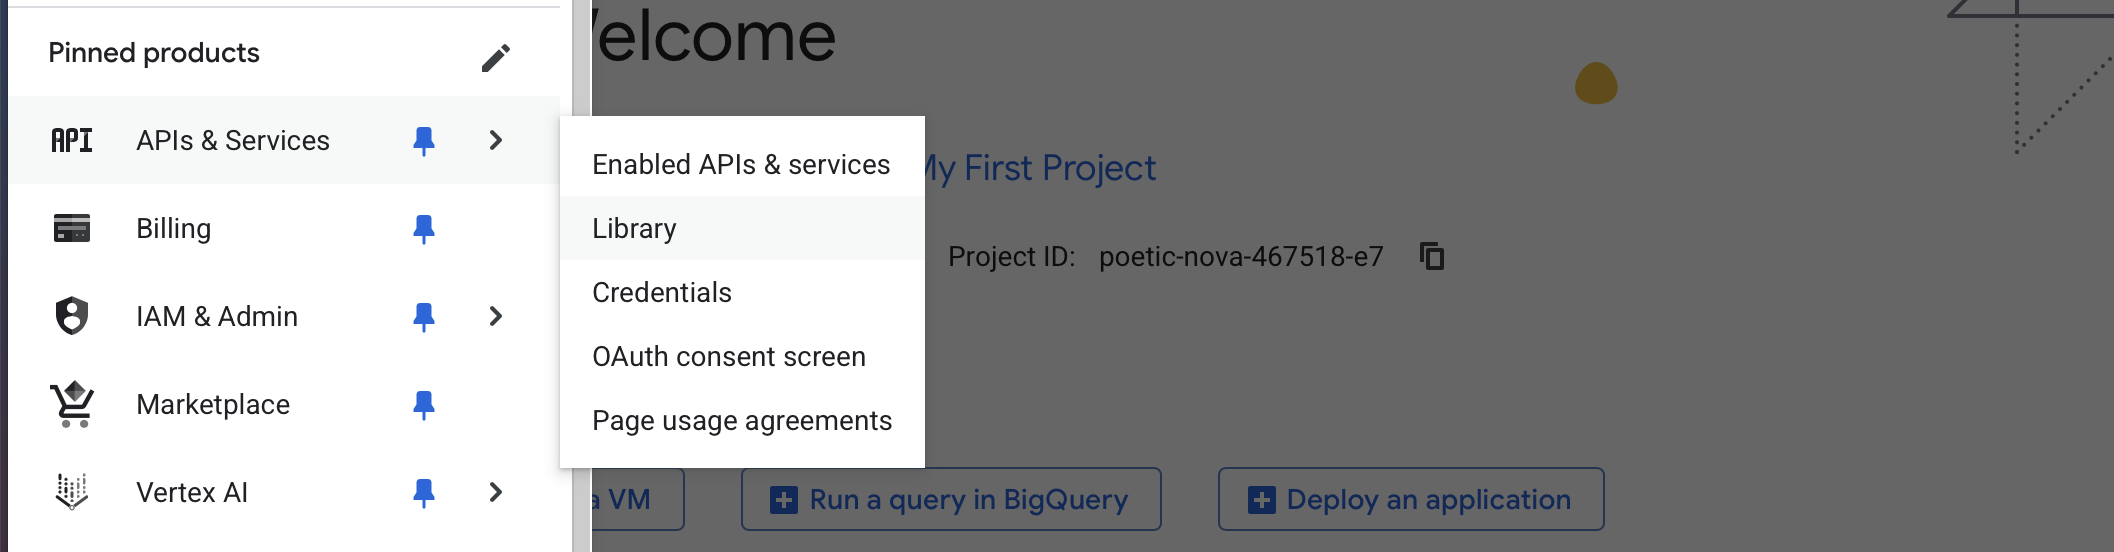
1. In the left sidebar, navigate to **APIs & Services** → **Library**
***
## Step 2: Create a New Project
1. Click the **project selector** dropdown at the top of the page (next to "Google Cloud")
2. In the dialog, click **NEW PROJECT** in the top-right corner or select an existing project
If creating a new project,
3. Fill in the project details including the Project name and organization
4. Click **CREATE**
5. Use the project selector to switch to your new project
**Using an Existing Project**
If you prefer to use an existing Google Cloud project, you can skip project creation and select your existing project instead.
***
## Step 3: Enable Required Google APIs
1. In the left sidebar, navigate to **APIs & Services** → **Library**
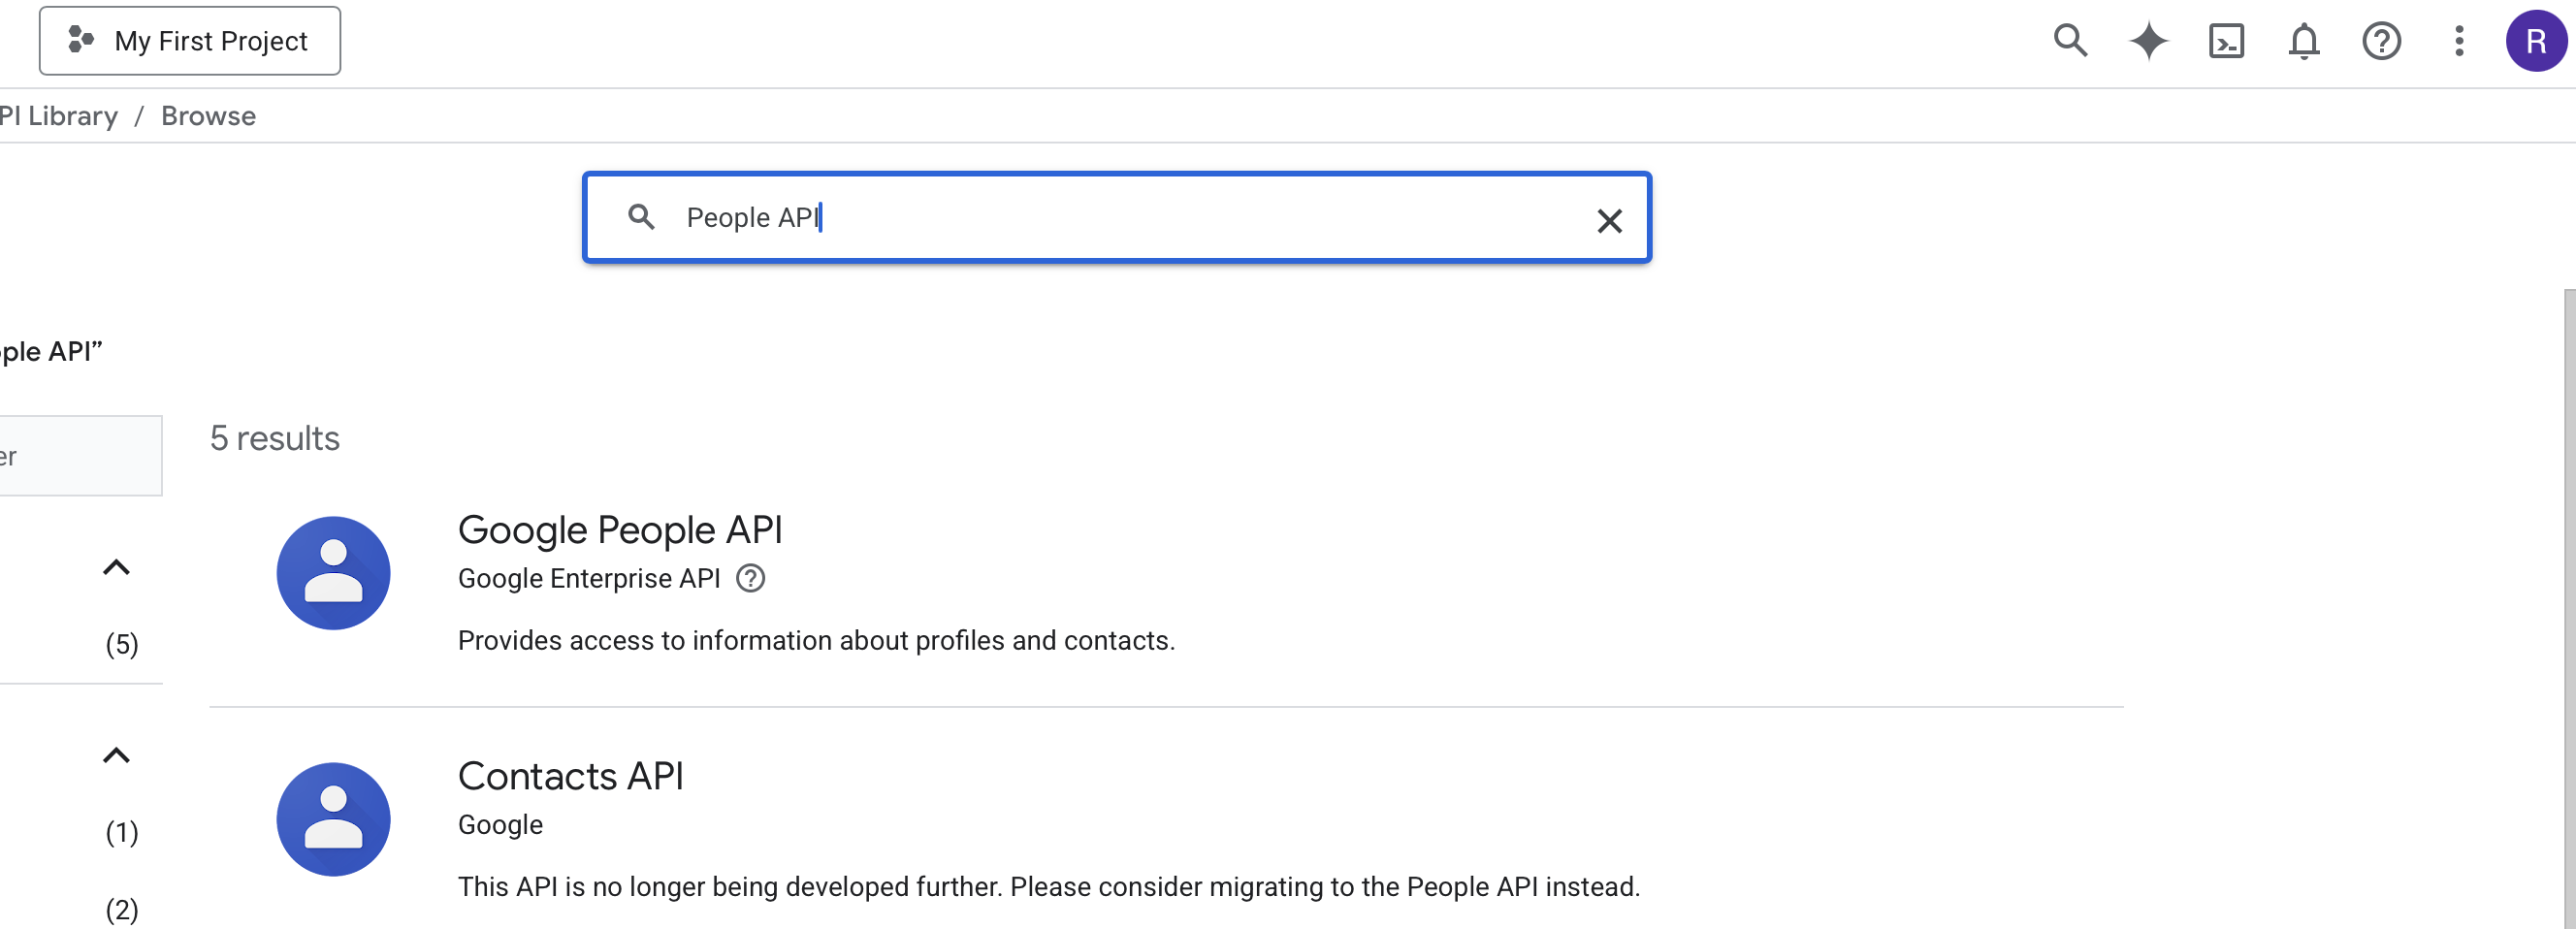
 2. Search for and enable each of these APIs by clicking on them and then clicking **ENABLE**:
* **Google Drive API** - For file access and management
* **Gmail API** - For email operations
* **Google Calendar API** - For calendar access
* **Google Docs API** - For document access
* **Google Slides API** - For presentation access
* **Google Contacts API** - For contacts management
* **People API** - For user profile information
2. Search for and enable each of these APIs by clicking on them and then clicking **ENABLE**:
* **Google Drive API** - For file access and management
* **Gmail API** - For email operations
* **Google Calendar API** - For calendar access
* **Google Docs API** - For document access
* **Google Slides API** - For presentation access
* **Google Contacts API** - For contacts management
* **People API** - For user profile information
 ***
## Step 4: Configure OAuth Consent Screen
1. In the left sidebar, go to **APIs & Services** → **OAuth consent screen**
2. Select "Create OAuth Client" and set **Application Type** as "Web Application"
3. Provide Application details including the Application Name and Redirect URLs. The callback URL should be pre-filled and set on the configuration page. This should default to `https://auth.airia.ai/OAuth/callback`.
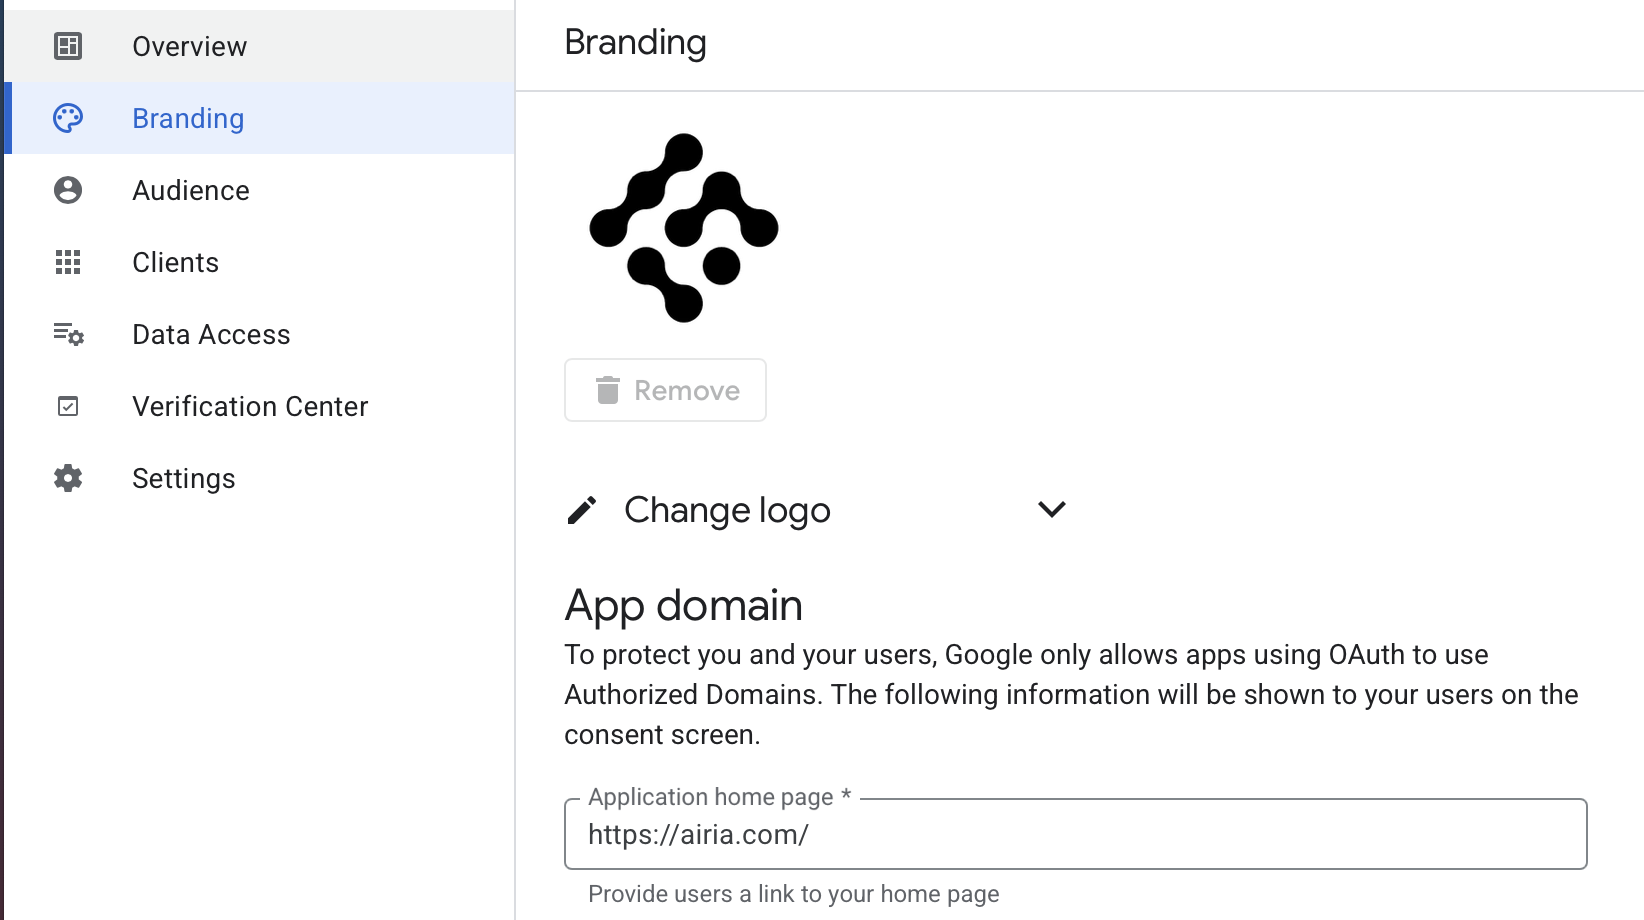
4. Once added, navigate through the other sections, such as Branding and Audience to configure additional details of your OAuth app.
5. Under Branding, upload your logo and provide details such as a Privacy policy link and home page to provide this information to users connecting to your app.
6. Under Audience, set the audience to Internal or External. Use Internal audience if only users within your organization will be connecting to the OAuth app. External apps should be used if your app will receive connections from users outside of your organization. Note - External app registrations are required to go through a verification process by Google.
***
## Step 4: Configure OAuth Consent Screen
1. In the left sidebar, go to **APIs & Services** → **OAuth consent screen**
2. Select "Create OAuth Client" and set **Application Type** as "Web Application"
3. Provide Application details including the Application Name and Redirect URLs. The callback URL should be pre-filled and set on the configuration page. This should default to `https://auth.airia.ai/OAuth/callback`.
4. Once added, navigate through the other sections, such as Branding and Audience to configure additional details of your OAuth app.
5. Under Branding, upload your logo and provide details such as a Privacy policy link and home page to provide this information to users connecting to your app.
6. Under Audience, set the audience to Internal or External. Use Internal audience if only users within your organization will be connecting to the OAuth app. External apps should be used if your app will receive connections from users outside of your organization. Note - External app registrations are required to go through a verification process by Google.
 5. Click **SAVE AND CONTINUE**
***
## Step 5: Add OAuth Scopes
1. On the **Data Access** page, click **ADD OR REMOVE SCOPES**
5. Click **SAVE AND CONTINUE**
***
## Step 5: Add OAuth Scopes
1. On the **Data Access** page, click **ADD OR REMOVE SCOPES**
 ### Recommended Scopes
Select or manually add the following scopes:
#### Gmail Scopes
* `https://www.googleapis.com/auth/gmail.send` - Send email on user's behalf
#### Calendar Scopes
* `https://www.googleapis.com/auth/calendar.events` - View and edit events on all calendars
#### Contacts Scopes
* `https://www.googleapis.com/auth/contacts` - See, edit, download, and permanently delete contacts
#### Drive Scopes
* `https://www.googleapis.com/auth/drive.file` - View and manage Google Drive files opened/created with this app
#### Docs & Slides Scopes
* `https://www.googleapis.com/auth/documents` - View and manage Google Docs documents
* `https://www.googleapis.com/auth/presentations` - View and manage Google Slides presentations
#### User Info Scopes
* `https://www.googleapis.com/auth/userinfo.email` - See your primary Google Account email address
**About Scopes**
These are the recommended scopes that Airia uses by default. You can:
* **Add more permissions** if you need additional functionality
* **Remove permissions** that you don't need (though this may limit Airia functionality)
### Recommended Scopes
Select or manually add the following scopes:
#### Gmail Scopes
* `https://www.googleapis.com/auth/gmail.send` - Send email on user's behalf
#### Calendar Scopes
* `https://www.googleapis.com/auth/calendar.events` - View and edit events on all calendars
#### Contacts Scopes
* `https://www.googleapis.com/auth/contacts` - See, edit, download, and permanently delete contacts
#### Drive Scopes
* `https://www.googleapis.com/auth/drive.file` - View and manage Google Drive files opened/created with this app
#### Docs & Slides Scopes
* `https://www.googleapis.com/auth/documents` - View and manage Google Docs documents
* `https://www.googleapis.com/auth/presentations` - View and manage Google Slides presentations
#### User Info Scopes
* `https://www.googleapis.com/auth/userinfo.email` - See your primary Google Account email address
**About Scopes**
These are the recommended scopes that Airia uses by default. You can:
* **Add more permissions** if you need additional functionality
* **Remove permissions** that you don't need (though this may limit Airia functionality)
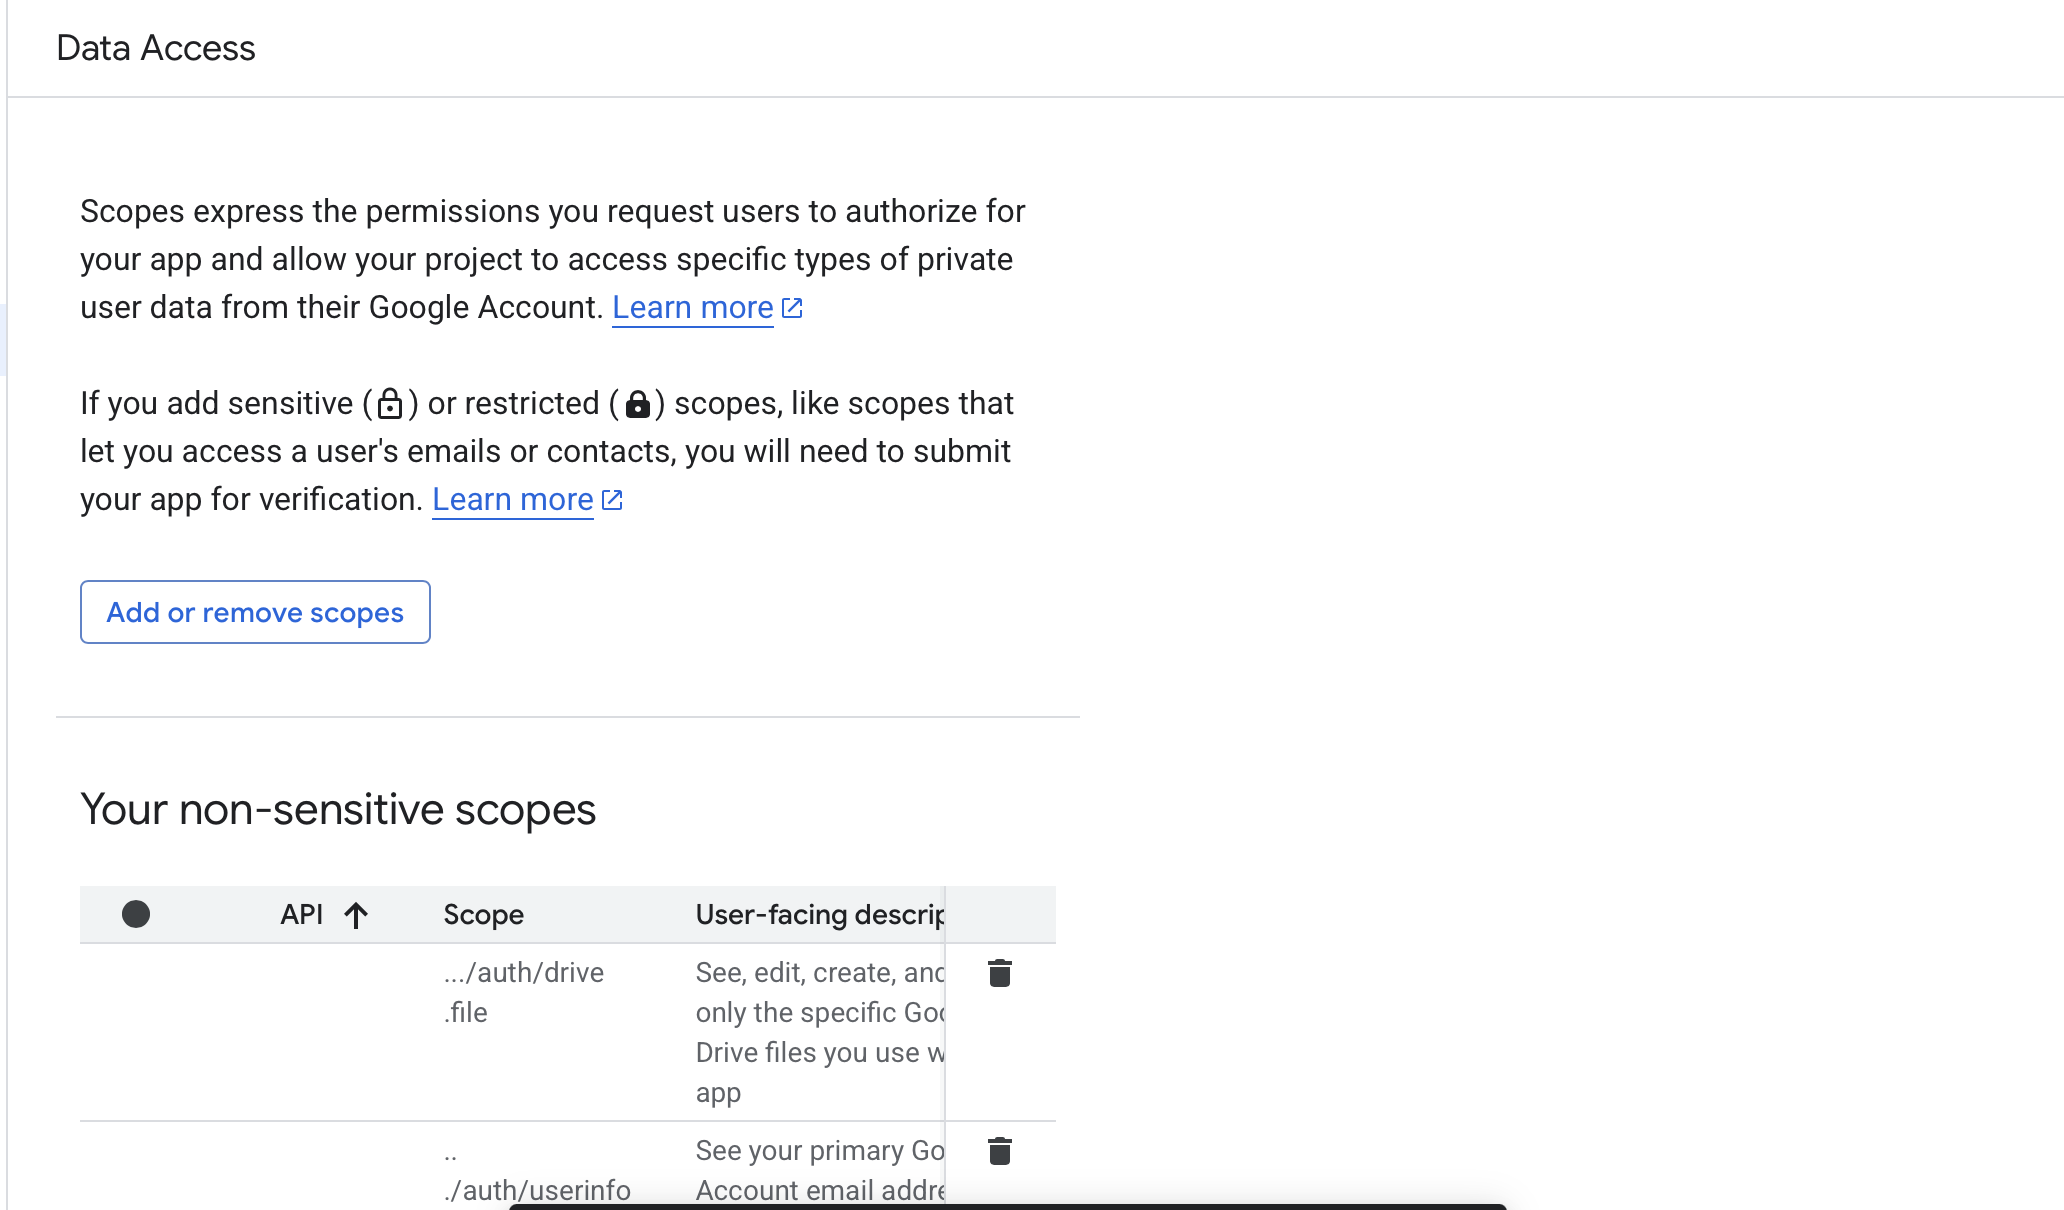 3. Click **UPDATE** at the bottom of the panel
4. Click **SAVE AND CONTINUE**
***
## Step 6: Add Test Users (External Apps Only)
If you selected **External** as your user type:
1. Click **+ ADD USERS**
2. Enter email addresses of users who should test the OAuth flow
3. Click **ADD**
4. Click **SAVE AND CONTINUE**
**Internal Apps Skip This Step**
If you chose **Internal** as your user type, all users in your Google Workspace organization are automatically able to use the app.
***
## Step 7: Create OAuth 2.0 Credentials
1. In the left sidebar, go to **APIs & Services** → **Credentials**
2. Click **+ CREATE CREDENTIALS** at the top
3. Select **OAuth client ID** from the dropdown
***
## Step 8: Copy Your OAuth Credentials
After creating the OAuth client, a dialog will appear with your credentials.
3. Click **UPDATE** at the bottom of the panel
4. Click **SAVE AND CONTINUE**
***
## Step 6: Add Test Users (External Apps Only)
If you selected **External** as your user type:
1. Click **+ ADD USERS**
2. Enter email addresses of users who should test the OAuth flow
3. Click **ADD**
4. Click **SAVE AND CONTINUE**
**Internal Apps Skip This Step**
If you chose **Internal** as your user type, all users in your Google Workspace organization are automatically able to use the app.
***
## Step 7: Create OAuth 2.0 Credentials
1. In the left sidebar, go to **APIs & Services** → **Credentials**
2. Click **+ CREATE CREDENTIALS** at the top
3. Select **OAuth client ID** from the dropdown
***
## Step 8: Copy Your OAuth Credentials
After creating the OAuth client, a dialog will appear with your credentials.
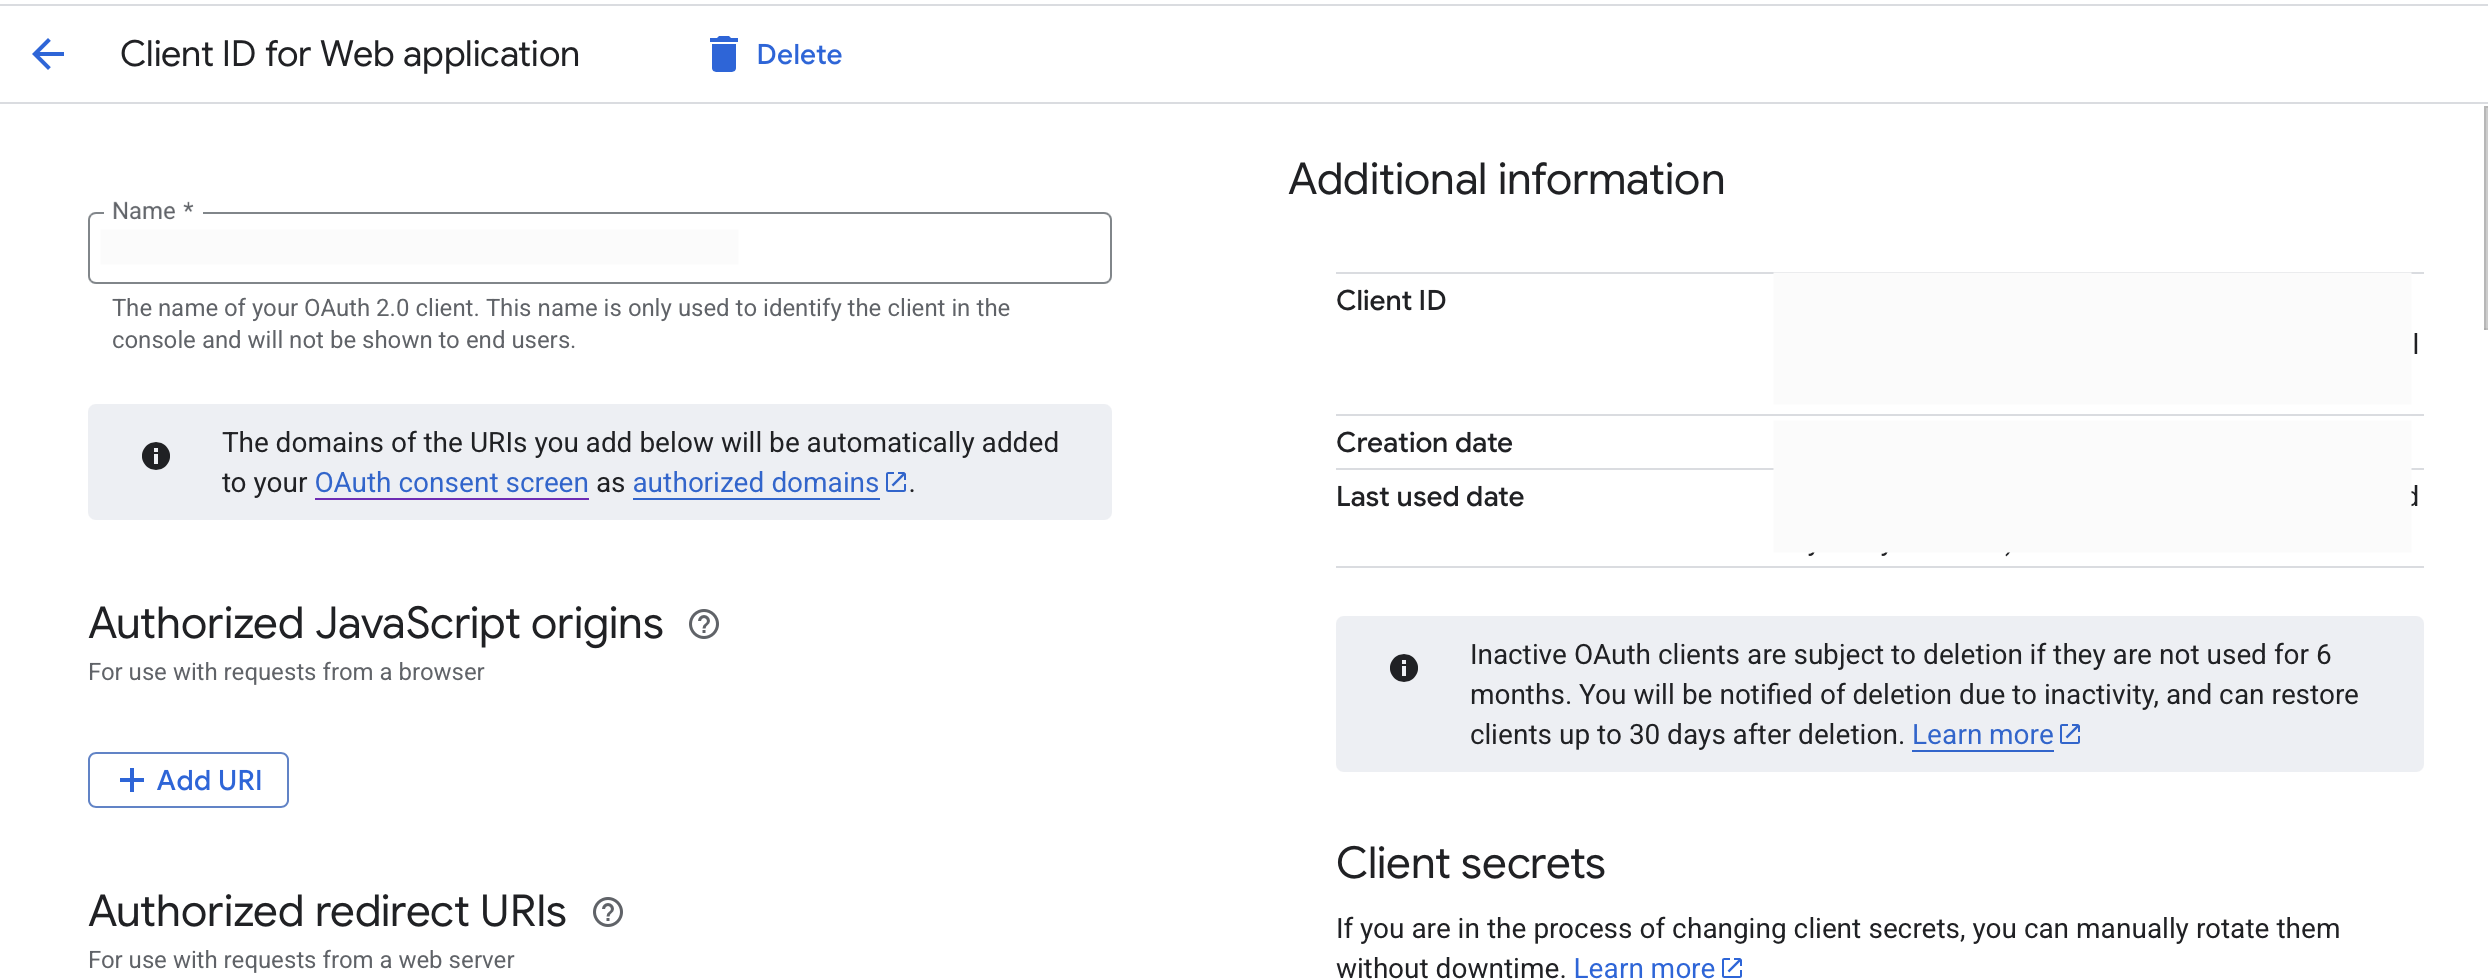 1. **Client ID**: Click the copy icon to copy your Client ID
2. **Client secret**: Click the copy icon to copy your Client Secret
3. Click **OK** to close the dialog
***
## Step 9: Configure OAuth in Airia
Now you'll enter these credentials into the Airia platform:
1. Log in to your Airia platform
2. Navigate to **Settings** → **Ecosystem** → **App Connections**
3. Select **Google** as the provider
4. Enter your credentials:
* **Client ID**: Paste the Client ID you copied
* **Client Secret**: Paste the Client Secret you copied
5. The callback URLs should be pre-filled and visible on the configuration page
6. Add or remove any permission scopes to match your OAuth Client configuration on Google
7. Click **Save** or **Connect**
1. **Client ID**: Click the copy icon to copy your Client ID
2. **Client secret**: Click the copy icon to copy your Client Secret
3. Click **OK** to close the dialog
***
## Step 9: Configure OAuth in Airia
Now you'll enter these credentials into the Airia platform:
1. Log in to your Airia platform
2. Navigate to **Settings** → **Ecosystem** → **App Connections**
3. Select **Google** as the provider
4. Enter your credentials:
* **Client ID**: Paste the Client ID you copied
* **Client Secret**: Paste the Client Secret you copied
5. The callback URLs should be pre-filled and visible on the configuration page
6. Add or remove any permission scopes to match your OAuth Client configuration on Google
7. Click **Save** or **Connect**
 ***
## Step 10: Test the Connection
1. After saving, click **Connect Account** in Airia
2. You'll be redirected to Google's OAuth consent screen
3. Sign in with your Google account (if not already signed in)
4. Review the permissions being requested
5. Click **Allow** or **Continue** to grant permissions
6. You should be redirected back to Airia with a success message
***
## Step 10: Test the Connection
1. After saving, click **Connect Account** in Airia
2. You'll be redirected to Google's OAuth consent screen
3. Sign in with your Google account (if not already signed in)
4. Review the permissions being requested
5. Click **Allow** or **Continue** to grant permissions
6. You should be redirected back to Airia with a success message
 ***
## Additional Resources
* [Google Cloud Console Documentation](https://cloud.google.com/docs)
* [Google API Scopes Reference](https://developers.google.com/identity/protocols/oauth2/scopes)
***
Need help? Contact Airia support or your IT administrator for assistance with Google Cloud Console configuration.
***
## Additional Resources
* [Google Cloud Console Documentation](https://cloud.google.com/docs)
* [Google API Scopes Reference](https://developers.google.com/identity/protocols/oauth2/scopes)
***
Need help? Contact Airia support or your IT administrator for assistance with Google Cloud Console configuration.