Supported Salesforce Tools
Airia includes several pre-built tools with Salesforce authentication in its library that can do tasks such as the following:- Create a Lead
- Retrieve Account details
- Run a SOQL Query
- Create a new contact in Salesforce account
- Create a SFDC quote
Add a Salesforce Tool with Authentication
Follow these steps to add and authenticate a Salesforce tool:-
Select a Salesforce Tool:
- Navigate to the Tools section in your Airia dashboard.
- From the library, select the desired Salesforce tool (e.g., Create a Lead, Retrieve Account details).
-
Review Tool Settings:
- On the tool configuration page, verify that the API and parameters are correctly listed for the selected tool. Salesforce tools leverage Salesforce’s APIs.
-
Update Salesforce Domain/Instance URL:
- Your Salesforce account has a unique domain that forms part of its URL (e.g.,
https://mycompany.my.salesforce.com). This is typically the same URL you use to access Salesforce in your browser. - Locate your specific Salesforce domain. (Refer to the Salesforce Documentation page for guidance on finding your Salesforce domain.)
- Update the tool’s URL field with your company’s Salesforce domain.
- Your Salesforce account has a unique domain that forms part of its URL (e.g.,
-
Choose Authentication Method:
- From the authentication fields dropdown, select Salesforce Authentication.
- You will see two permission options:
- Allow access to the current user (full scope)
- Allow your application to perform requests (api scope)
- For most use cases, select Allow access to the current user (full scope) to grant comprehensive access.
- Here, you can also select the Salesforce instance you want to authenticate - Live or Sandbox
-
Verify Credentials and Save:
- After successfully authenticating, the saved credentials should appear under the tool’s configuration.
- Click Save to add the configured tool to your library.
Verify Tool Execution
After adding the Salesforce tool to an agent, execute the agent to verify that the tool works correctly: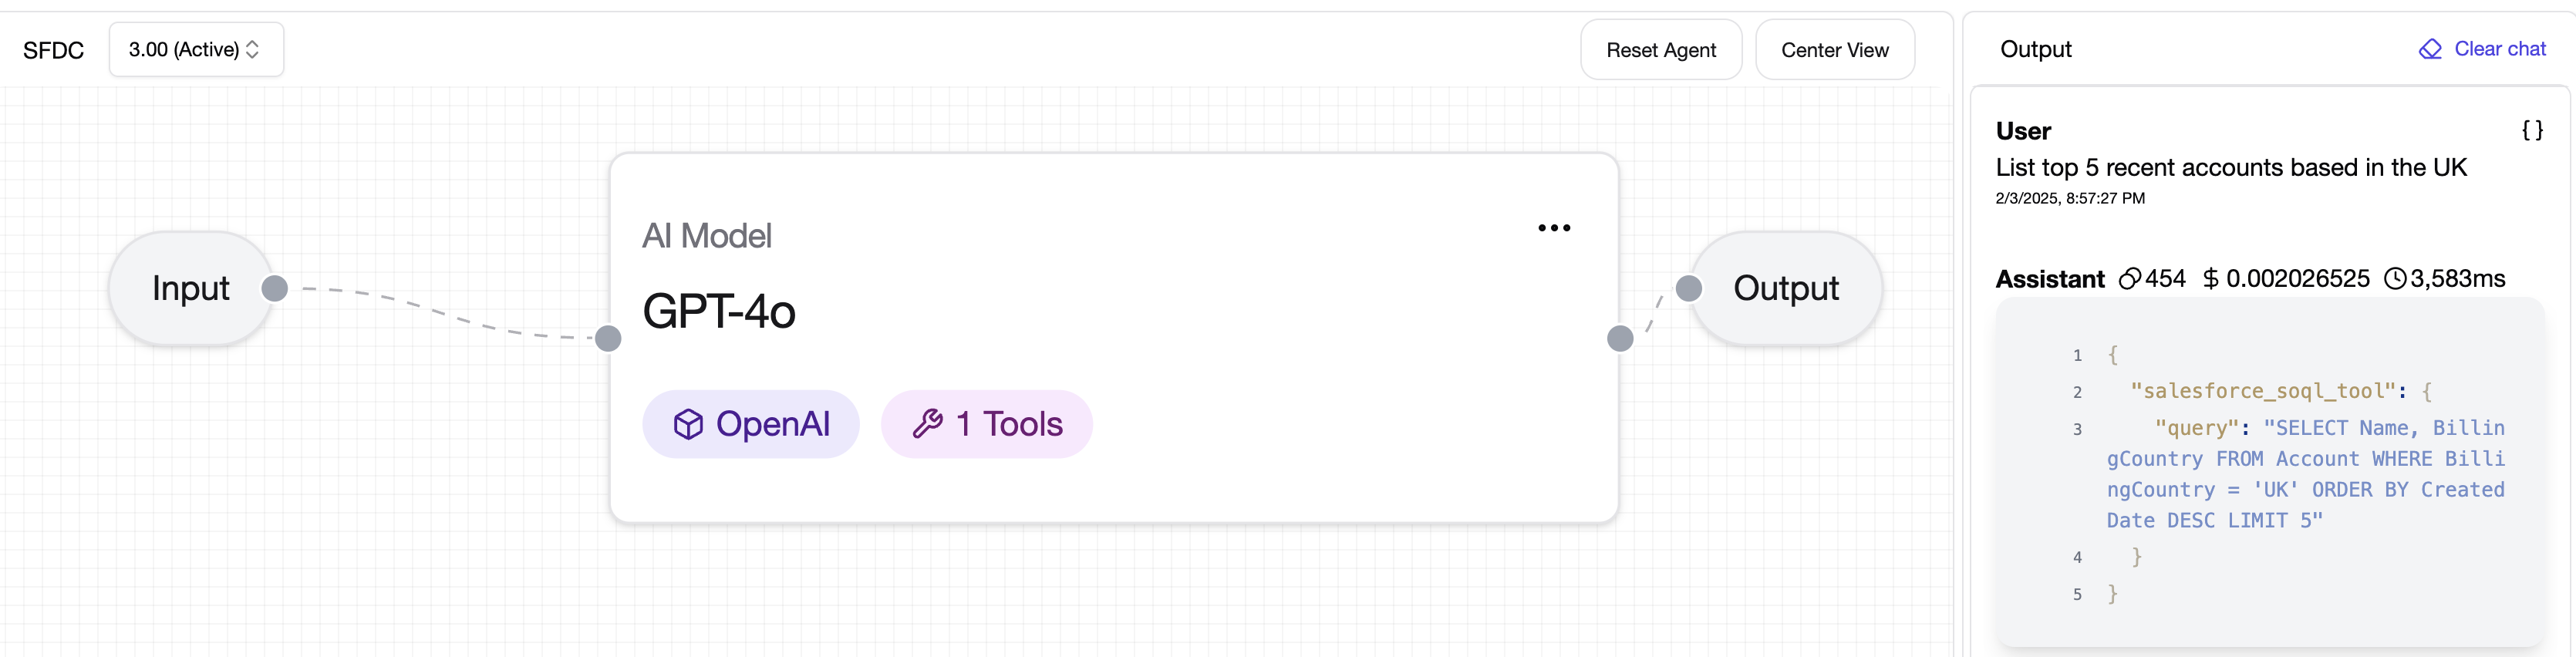
💡 Note: For improved model responses when using Salesforce tools, consider adding a prompt that provides details about your organization, specific fields, or terminology relevant to your use case.