- Snowflake SQL Query Tool: To execute SQL queries against your Snowflake database.
- Snowflake Metadata Retrieval Tool: To retrieve schema metadata for your Snowflake database.
Prerequisites
To connect Airia to your Snowflake account, you will need the following details:- Account Identifier: Your Snowflake account ID (e.g.,
ORGANIZATION-ACCOUNT). - User name: The username for the Snowflake user account.
- Database name: The name of the database you want to connect to.
- Warehouse name: The name of the warehouse to use for queries.
- Type of Authentication: Whether your Private Key is encrypted or unencrypted.
💡 Note: It is highly recommended to use a user account with the least necessary privileges for this integration. See the Required Snowflake Permissions section for details.
Retrieve Snowflake Connection Details
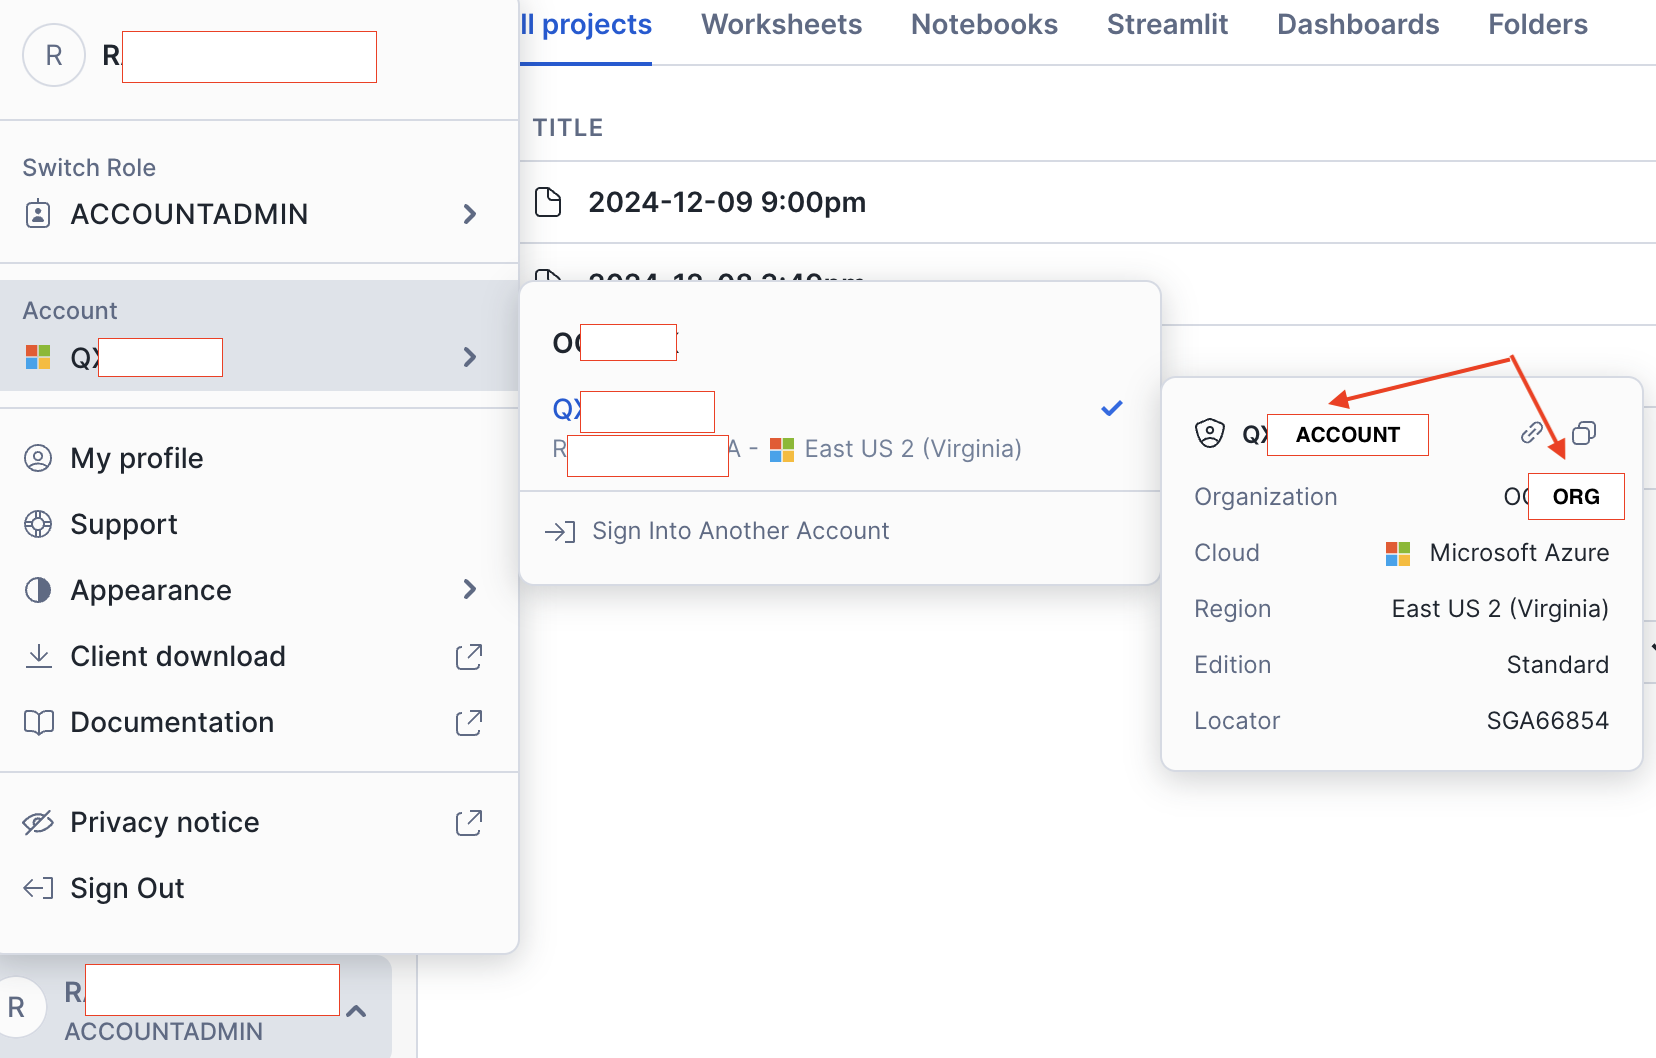
Follow these steps to obtain your Snowflake account identifier:- Log in to your Snowflake account.
- Navigate to your profile menu (usually in the top right corner).
- Your Account identifier will typically be displayed there, following the format
ORGANIZATION-ACCOUNT(e.g.,ODWKPWH.QZE19753).
Setup Key-Pair Authentication
Snowflake tools in Airia utilize Key-Pair Authentication for secure connections. This requires generating a private key file and uploading its corresponding public key to Snowflake.- Follow the instructions in the Snowflake documentation for Key Pair Authentication to generate your private key file (e.g., using OpenSSL).
- Upload the corresponding Public key file to your Snowflake user with the
ALTER USER <username> SET RSA_PUBLIC_KEY='<public_key_content>';command. - Securely save your generated Private Key file.
- If your Private Key file is encrypted, also securely save the passphrase you used.
Add and Configure Snowflake Tools
Follow these steps to add and configure each Snowflake tool:-
Add the Snowflake SQL Query Tool:
- Navigate to the Tools section in your Airia dashboard.
- From the library, select Snowflake SQL Query to add it to your project.
-
Provide Connection Details:
- On the tool configuration page, provide the following values:
- Account ID: Your Snowflake account identifier (e.g.,
ORGANIZATION-ACCOUNT). - User name: The Snowflake user account.
- Database name: The target database.
- Warehouse name: The warehouse to use.
- Account ID: Your Snowflake account identifier (e.g.,
- For the Private Key, you must create a new Credentials object. Select the type that matches your private key (e.g., Encrypted Private Key or Unencrypted Private Key) and provide the private key content and passphrase (if applicable).
- On the tool configuration page, provide the following values:
-
Save the Tool:
- Click Save to add the configured tool to your library.
-
Repeat for Metadata Tool:
- Repeat steps 1-3 for the Snowflake Metadata Retrieval Tool, providing the same connection values.
Required Snowflake Permissions
To connect your Snowflake tools to the Airia platform, it is recommended to use a User Account that has the least-privilege permissions necessary to interact with your data. The Snowflake user account configured in the Airia tool needs a role with the following privileges:USAGEprivilege on the target Warehouse.USAGEprivilege on the target Database.USAGEprivilege on the target Schema(s) in the database.SELECTprivilege on the specific Tables in the schema(s) that you want the tools to query metadata for and run queries against.
ACCOUNTADMIN or SECURITYADMIN) can use the following SQL template to create a dedicated read-only role and user with the necessary grants:
⚠️ Warning: Ensure that these steps are carried out from an account with sufficient privileges (e.g.,ACCOUNTADMINorSECURITYADMIN) to create a new user account and manage grants.