For an overview of managing all interface types, see Managing Agent Interfaces.
What is the Tool & MCP Interface?
The Tool & MCP interface exposes your agent as a callable tool through the Airia Deployed Agents MCP server, so other agents can discover and call it using MCP standards. Most teams can use the defaults; optionally, you can add structured input/output schemas and tool annotations for stricter, machine-readable contracts.Prerequisites
- Your agent must have an Active version published
- You need appropriate permissions (admin, project-admin, or security-admin) to configure tool interfaces
Configuration Steps
Most teams can get started by setting a name and description only. Airia will automatically provide a default input format so you don’t need to define schemas.Access the Interfaces Panel
Access the interfaces panel by either:
- Clicking the ellipsis (…) menu to the right of your Agent and selecting Interfaces
- Opening the Agent in Studio and clicking Settings > Interfaces
Add Tool & MCP Interface
In the interfaces panel, click ”+ Add Interface” and select Tool & MCP from the available interface types.
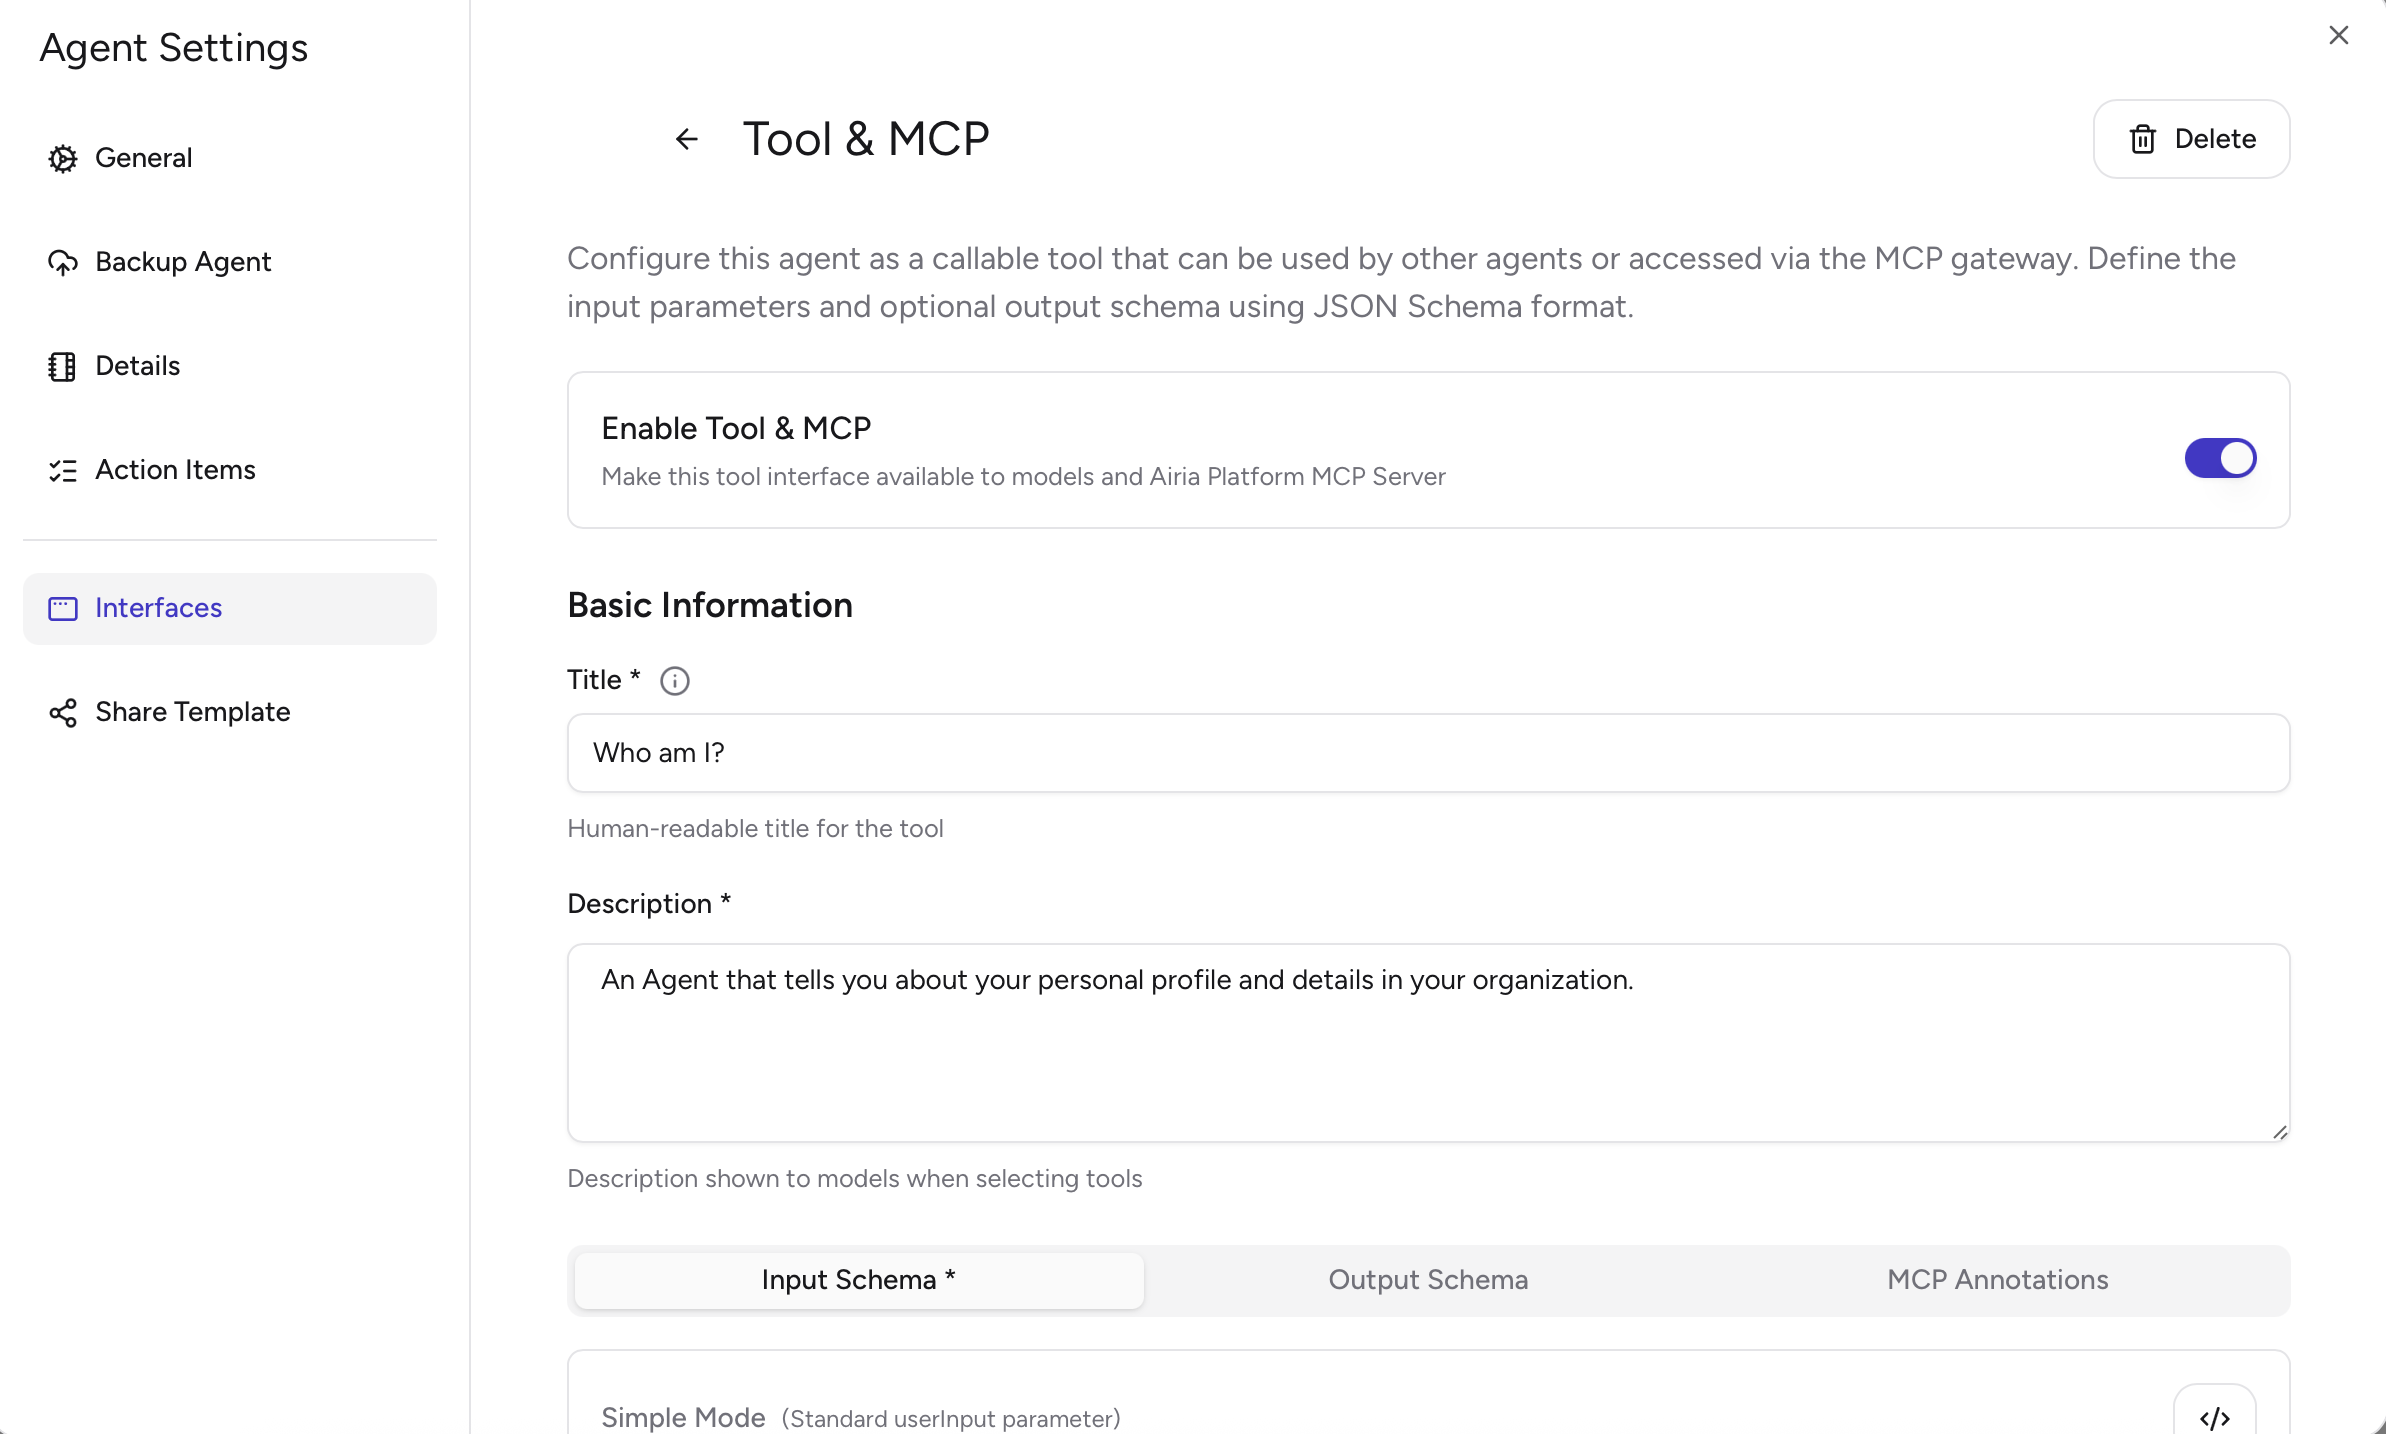
Configure Tool Title
Enter a unique tool name that will be used to identify your agent as a tool:
- Example:
customer_support_agent,data_analyzer,email_processor
The tool name is automatically generated from the name of the Agent, but you can customize it. This name will appear with the
ati_ prefix when exposed through the MCP server (e.g., ati_customer_support_agent).Provide Tool Description
Create a clear description of what your agent tool does. This description helps other agents understand when and how to use your tool
- Example: “Analyzes customer support tickets and provides recommended responses based on ticket content and customer history”
Screenshot placeholder: Interfaces panel showing Tool & MCP configured for an agent.
Replace the image path below with your screenshot.
Replace the image path below with your screenshot.
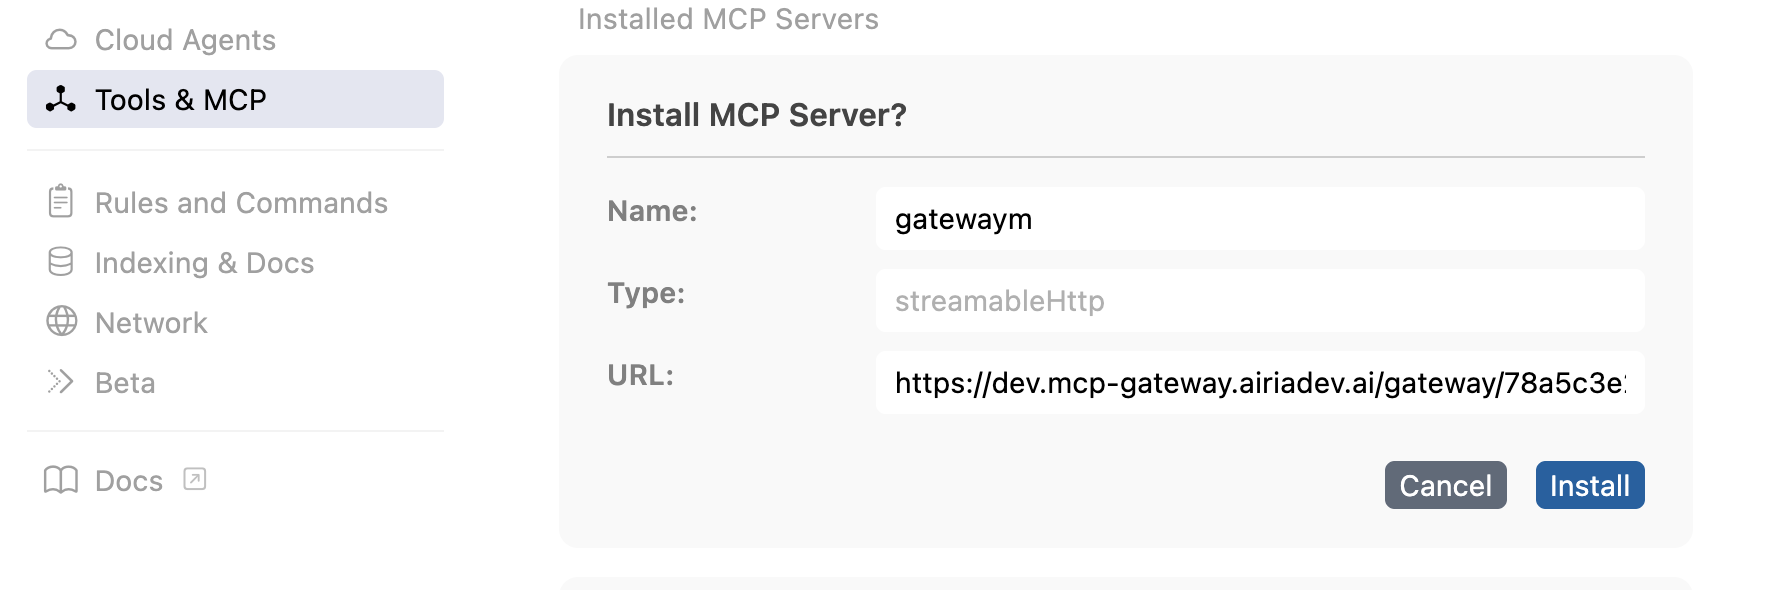
Using Your Agent Tool
Once configured, your agent tool can be used by other agents through an MCP Gateway connection to the Airia Deployed Agents MCP server.Screenshot placeholder: MCP Gateway server selection showing Airia Deployed Agents MCP.
Replace the image path below with your screenshot.
Replace the image path below with your screenshot.
Configure authentication
Configure the gateway using one of the following authentication options:
- Passthrough bearer token (recommended): the gateway will pass your Gateway OAuth access token through to the MCP server, and tools will automatically authenticate.
- API key: you must provide the API key during gateway setup.
With passthrough, agents and tool calls run on behalf of the signed-in user represented by the access token.
Screenshot placeholder: Gateway auth configuration showing Bearer passthrough enabled.
Replace the image path below with your screenshot.
Replace the image path below with your screenshot.
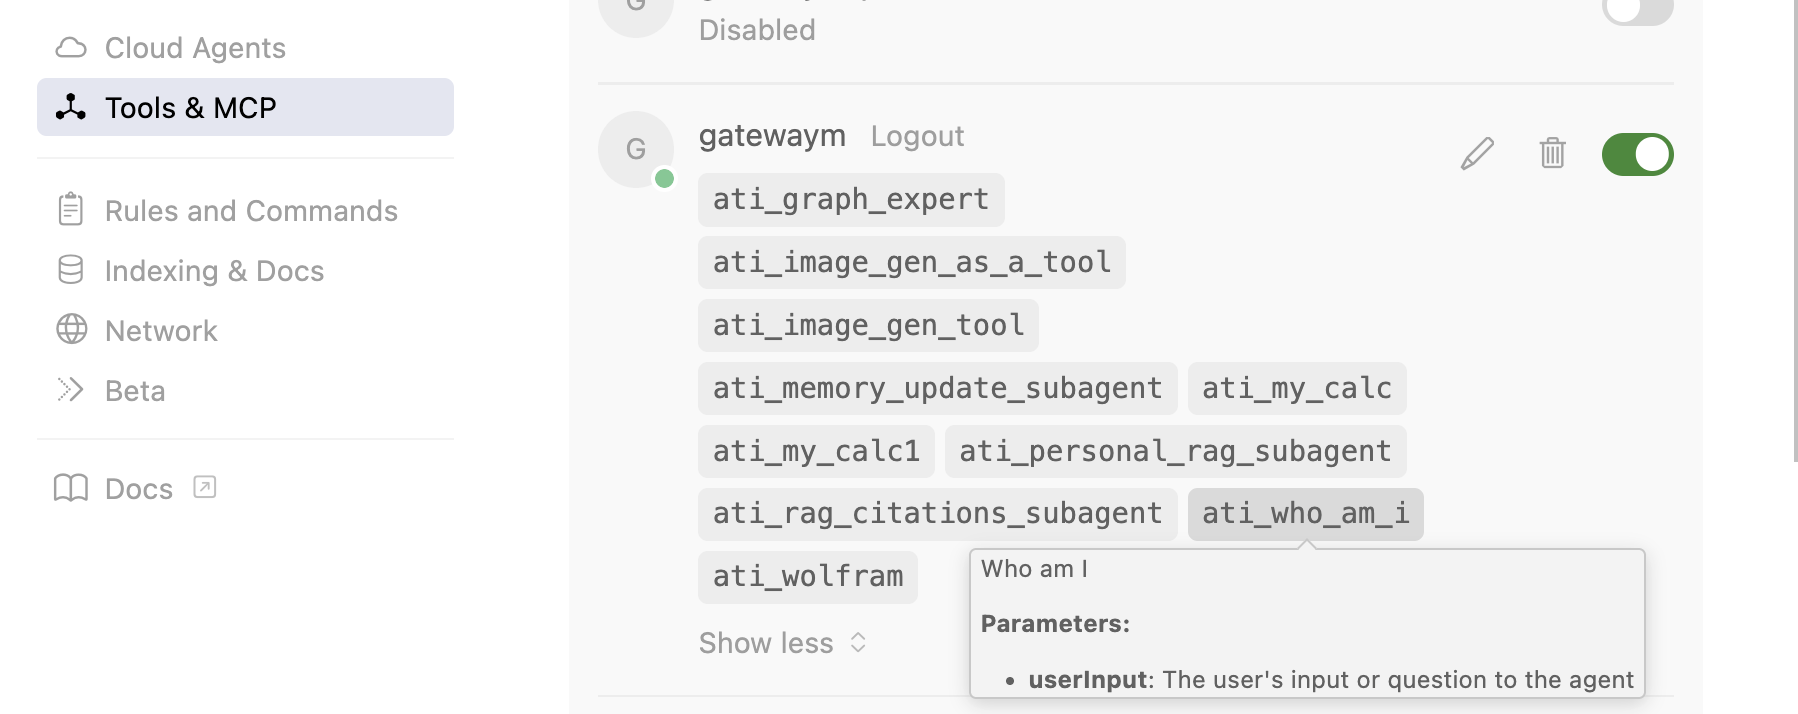
Discover tools (agents) based on access
The agents you see (and can call) depend on your level of access. Tool discovery and tool execution are scoped to the user and permissions represented by the access token.
Screenshot placeholder: “Agents as tools” list returned from tool discovery (showing
Replace the image path below with your screenshot.
ati_ tools).Replace the image path below with your screenshot.
Screenshot placeholder: Using Airia Deployed Agents MCP from a 3rd-party MCP client (example: Postman).
Replace the image path below with your screenshot.
Replace the image path below with your screenshot.
Advanced setup (structured input & output)
If you want strict, machine-readable parameters (recommended for complex tools or multi-team reuse), define JSON schemas for input and output and optionally add tool behavior annotations.Define Input Schema (JSON Schema)
Define the JSON schema for input parameters your tool should accept:
- Use the schema builder to visually create your schema, or paste a JSON schema directly
- Define required vs optional fields, types, and descriptions
- Example schema:
If you don’t define schemas, Airia will use a default input format (recommended for most teams).
Define Output Schema (Optional)
Optionally define a JSON schema for the response structure so callers know what to expect.
Configure MCP Annotations (Optional)
Tool annotations provide hints about behavior:
- Destructive Hint: tool performs destructive operations (default: false)
- Idempotent Hint: repeated calls with same input produce the same result (default: true)
- Open World Hint: tool can handle inputs beyond training data (default: true)
- Read Only Hint: tool only reads data (default: true)
Related Documentation
- Managing Agent Interfaces - Overview of all interface types
- API Interface Configuration - REST API access
- MCP Tools Documentation - Learn about MCP tools and integrations