Overview
This guide walks you through configuring your Microsoft Entra tenant to allow Airia to access a designated service mailbox using a secure OAuth flow. No browser-based login is required — Airia authenticates directly using an app registration and client secret.Prerequisites
Before you begin, ensure you have:- Azure admin access - An account with Global Administrator or Application Administrator role
- Exchange Online PowerShell access - Required for the mailbox access policy step
- Service mailbox - A designated service mailbox that Airia will read from (e.g.,
airia-service@yourcompany.com)
Step 1: Create an App Registration
- Go to the Microsoft Entra admin center and sign in with your admin account
- In the left nav, go to Applications → App registrations
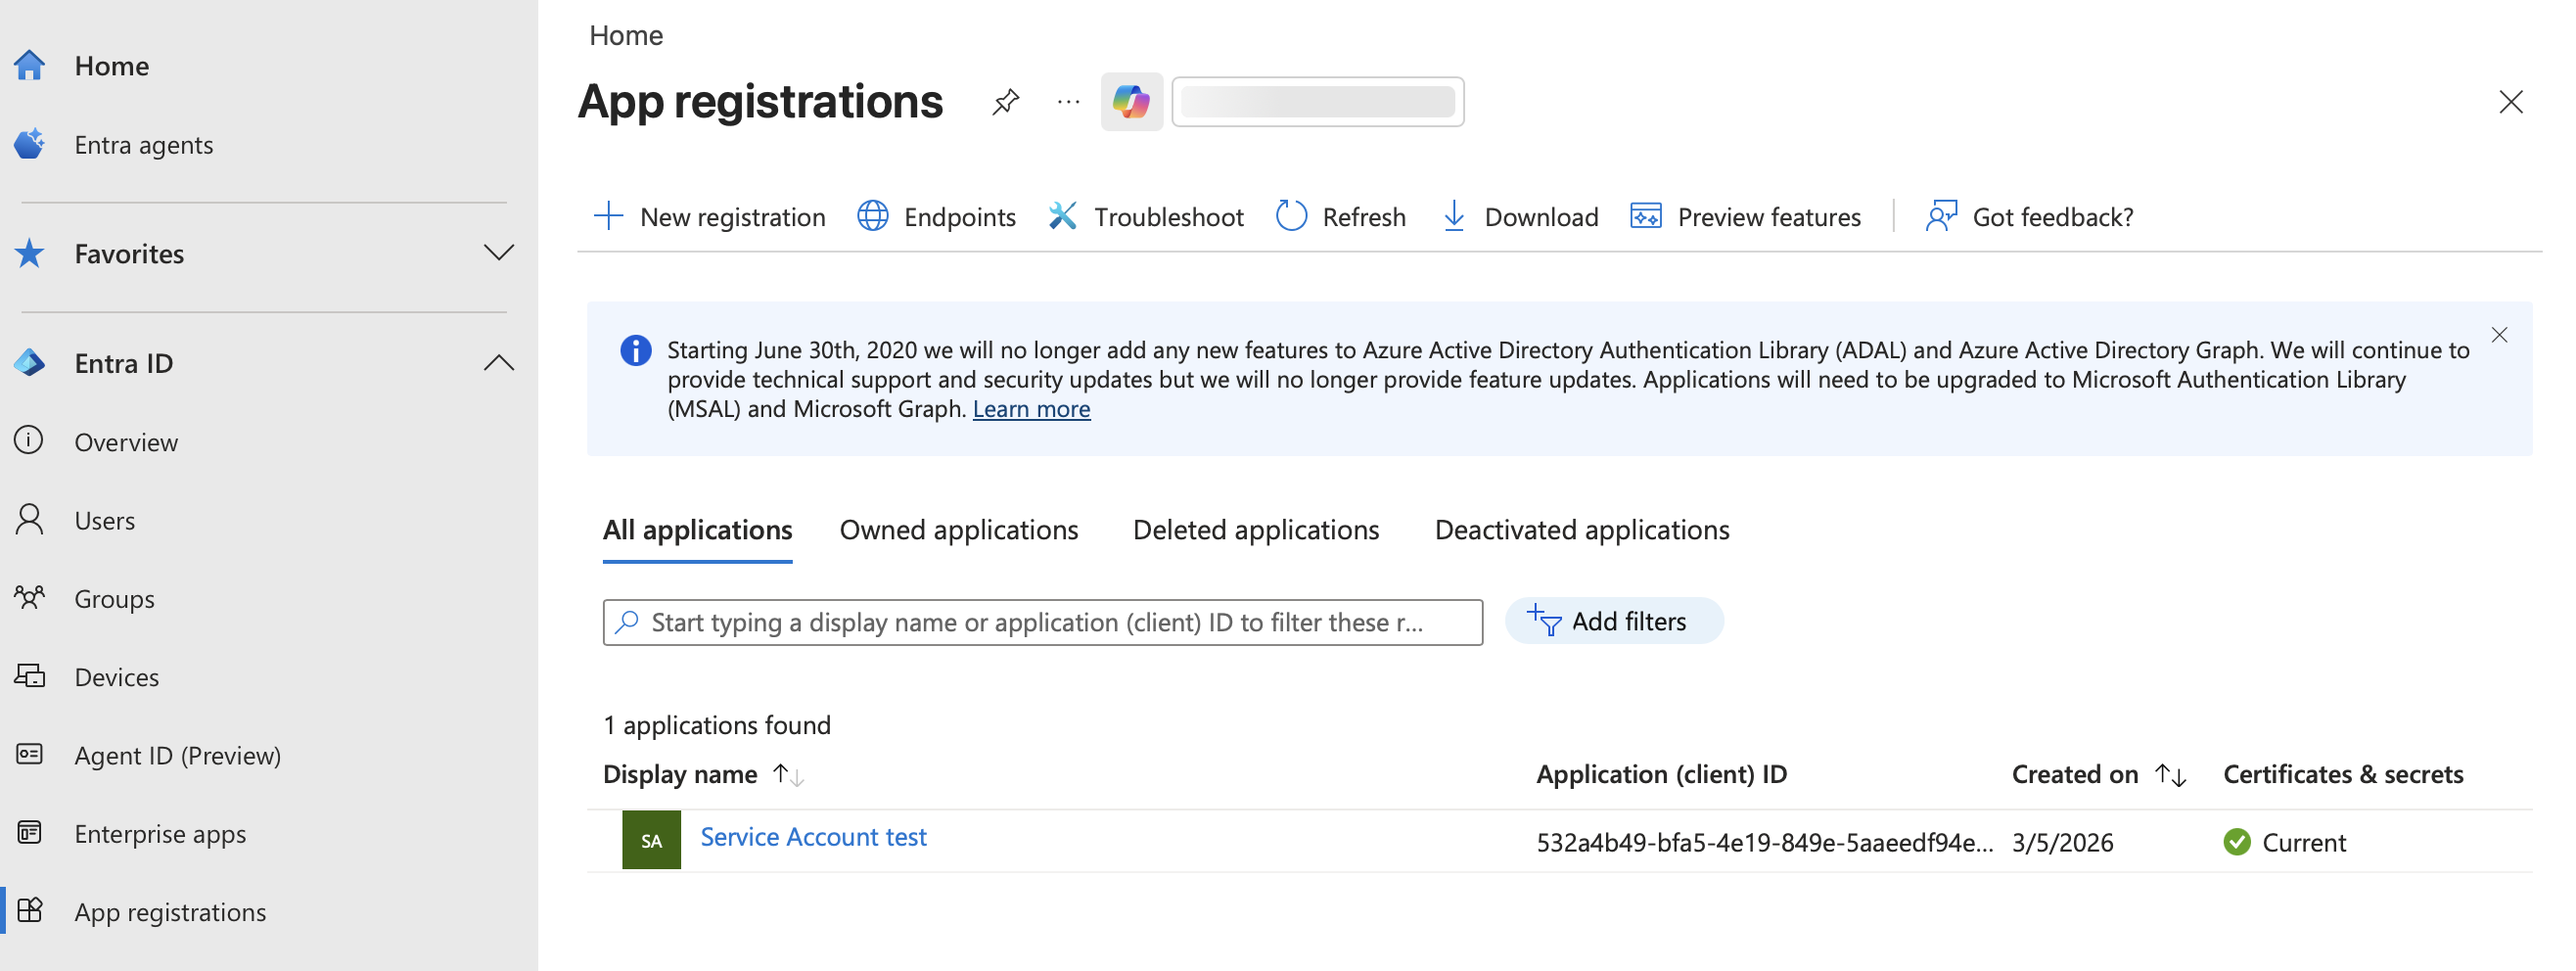
- Click + New registration
- Fill in the following:
- Name:
Airia Service Account(or any descriptive name) - Supported account types:
Accounts in this organizational directory only (Single tenant) - Redirect URI: Leave blank
- Name:
- Click Register
- Application (client) ID
- Directory (tenant) ID
Step 2: Create a Client Secret
- In the left nav under Manage, click Certificates & secrets
- Click + New client secret
- Give it a description (e.g.,
Airia secret) and set an expiry (24 months recommended) - Click Add
- Immediately copy the Value
Step 3: Add API Permissions
- In the left nav under Manage, click API permissions
- Click + Add a permission
- Select Microsoft Graph
- Select Application permissions (not Delegated)
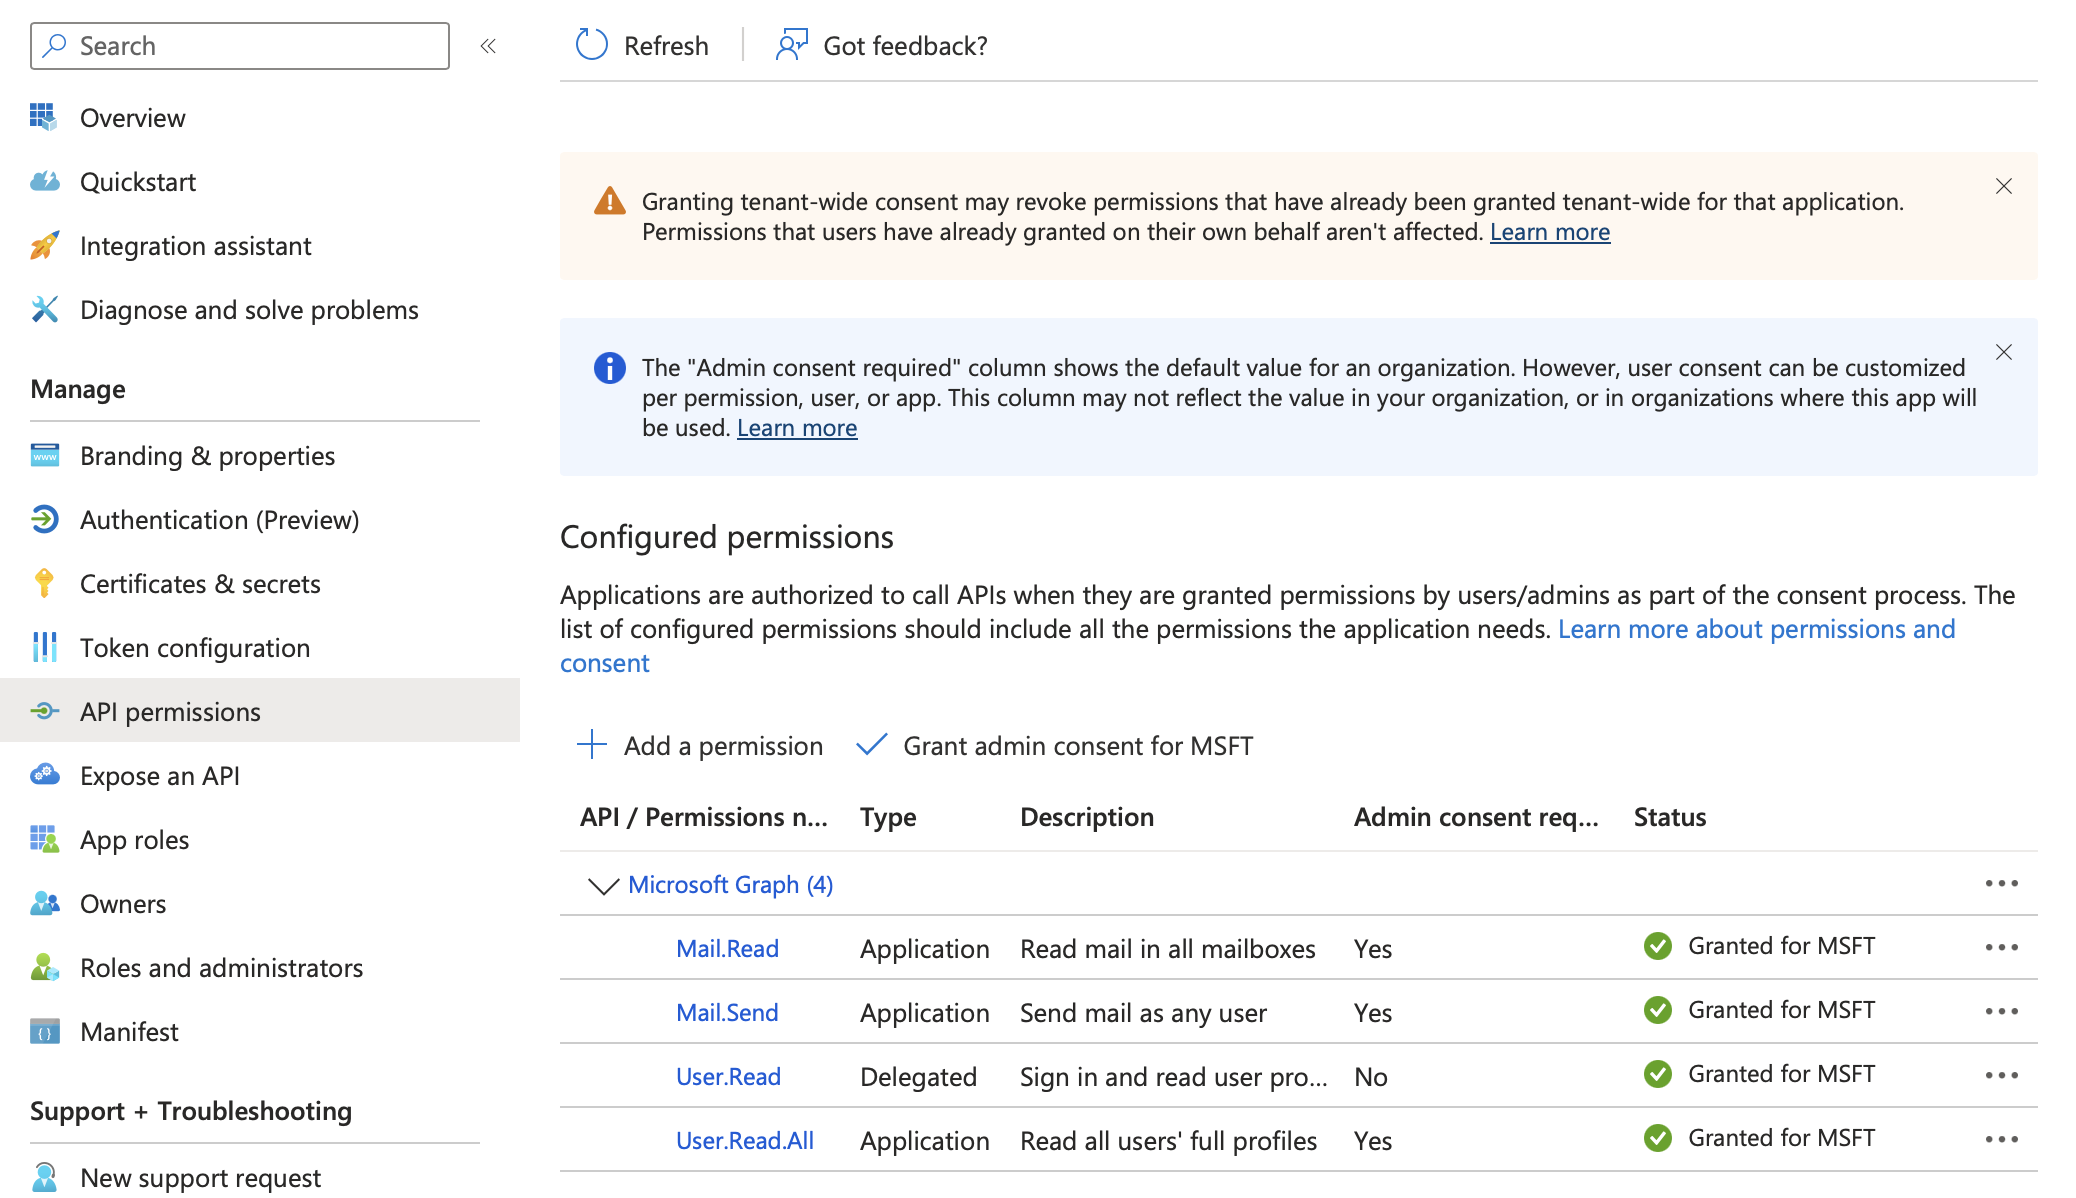
Required Permissions
Search for and add the permissions based on what you want Airia to do. You can refer to common permissions in the Microsoft Entra ID OAuth App Setup guide.- Click Add permissions
Grant Admin Consent
- Click Grant admin consent for [your organization] and confirm
- All permissions should show a green checkmark with “Granted for [your org]” status
Step 4: Restrict Access to the Service Mailbox Only
1. Install Exchange Online PowerShell (if not already installed)
2. Connect to Exchange Online
You must use an M365 organizational account, not a personal Microsoft account.
3. Create the Access Policy
Run the following command to restrict access:<Application-Client-ID>with the client ID from Step 1<service-mailbox@yourcompany.com>with your designated service mailbox address
4. Verify the Policy
AccessCheckResult: Granted.
You can also confirm the app cannot access other mailboxes:
AccessCheckResult: Denied.
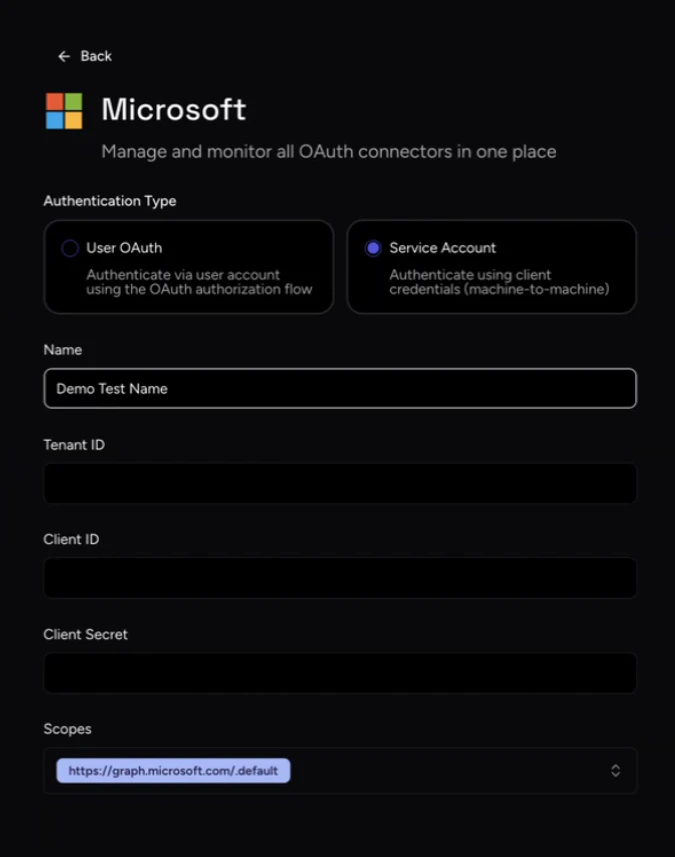
Step 5: Configure Service Account in Airia
With your credentials gathered, you can now configure the Service Account in your Airia platform:- Log in to your Airia platform as an administrator
- Navigate to Settings → Ecosystem → App Connections → Microsoft
- Select the Service Account authentication method
- Enter the credentials you gathered in the previous steps:
- Tenant ID: The Directory (tenant) ID from the app overview
- Client ID: The Application (client) ID from the app overview
- Client Secret: The secret value you copied in Step 2
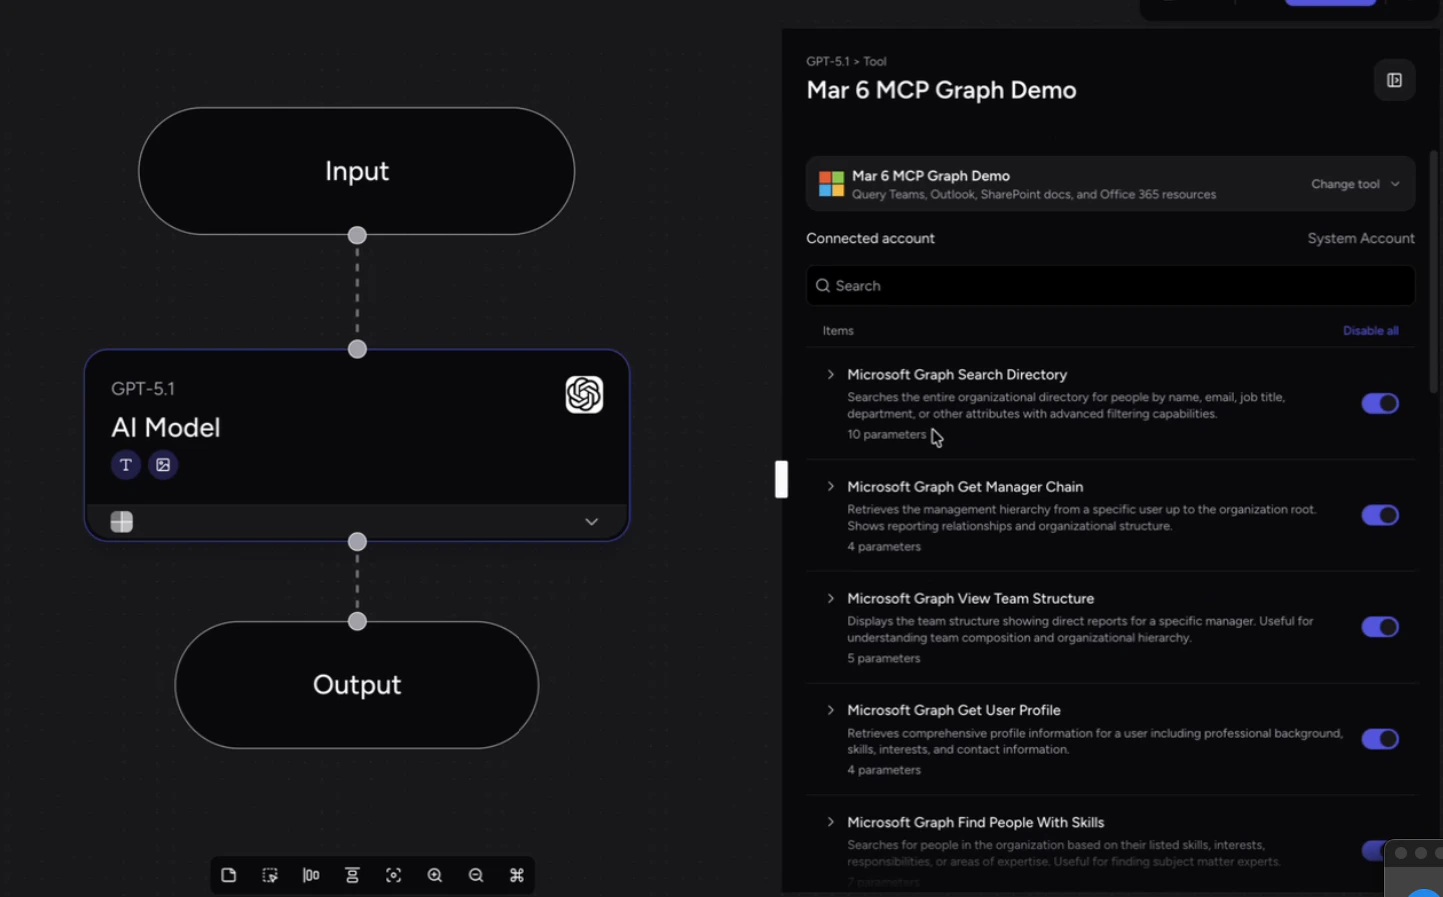
Step 6: Use the Service Account with Microsoft Graph MCP
Once configured, you can use this Service Account to power Microsoft tools via an MCP Server:- Set up a new Microsoft Graph MCP server in your Airia platform
- During setup, select the Microsoft Service Account connection you just configured, then save it
- Create a new Agent and attach this Microsoft Graph MCP server to it
- Based on the scopes and roles you assigned, the agent will automatically discover and display the available Microsoft Graph tools
Additional Resources
- [Microsoft Authentication Guide](/integrations/Tools/Microsoft\ Authentication): Learn more about different ways to authenticate Microsoft services in Airia.
- Understanding MCP Servers: Discover how the Model Context Protocol enables seamless integrations between your AI agents and enterprise tools.