To use GitHub, you will have to generate a Personal Access Token via your GitHub account, and authenticate with specific permissions.
Creating a Personal Access Token
-
Access GitHub Developer Settings
These can be found under Settings → Developer Settings.
-
Generate New Token
Generate a new token with the permissions you want to provide.
-
Repository Access
For access to specific repositories, select All Repositories.
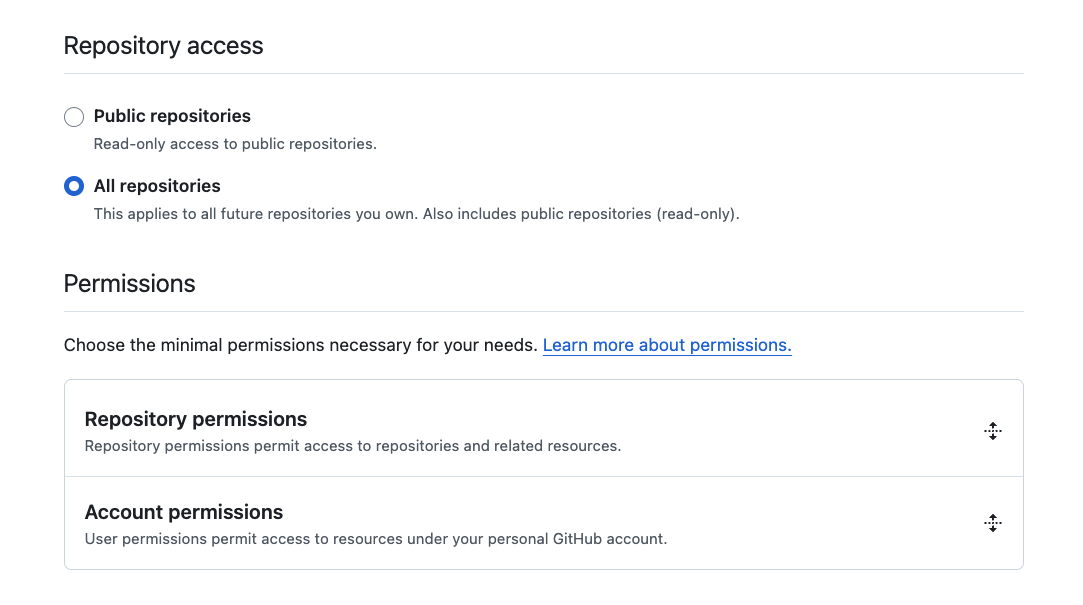
Required Permissions
In general, you will need to provide Metadata access for repositories, and any other actions you may want to carry out using your Agents.
Configure your token with appropriate permissions based on your use case:
- Metadata: Required for basic repository access
- Contents: For reading and writing files in repositories
- Issues: For creating and managing issues
- Pull requests: For managing pull requests
- Actions: For workflow management
- Administration: For repository administration tasks
Personal Access Token provisioning may be limited by your Organization and may send an approval request to your GitHub organization admin. GitHub does not show this step when you generate the token, but the permissions will not be available until this step is completed.
 Once your Personal Access Token is saved and approved:
-
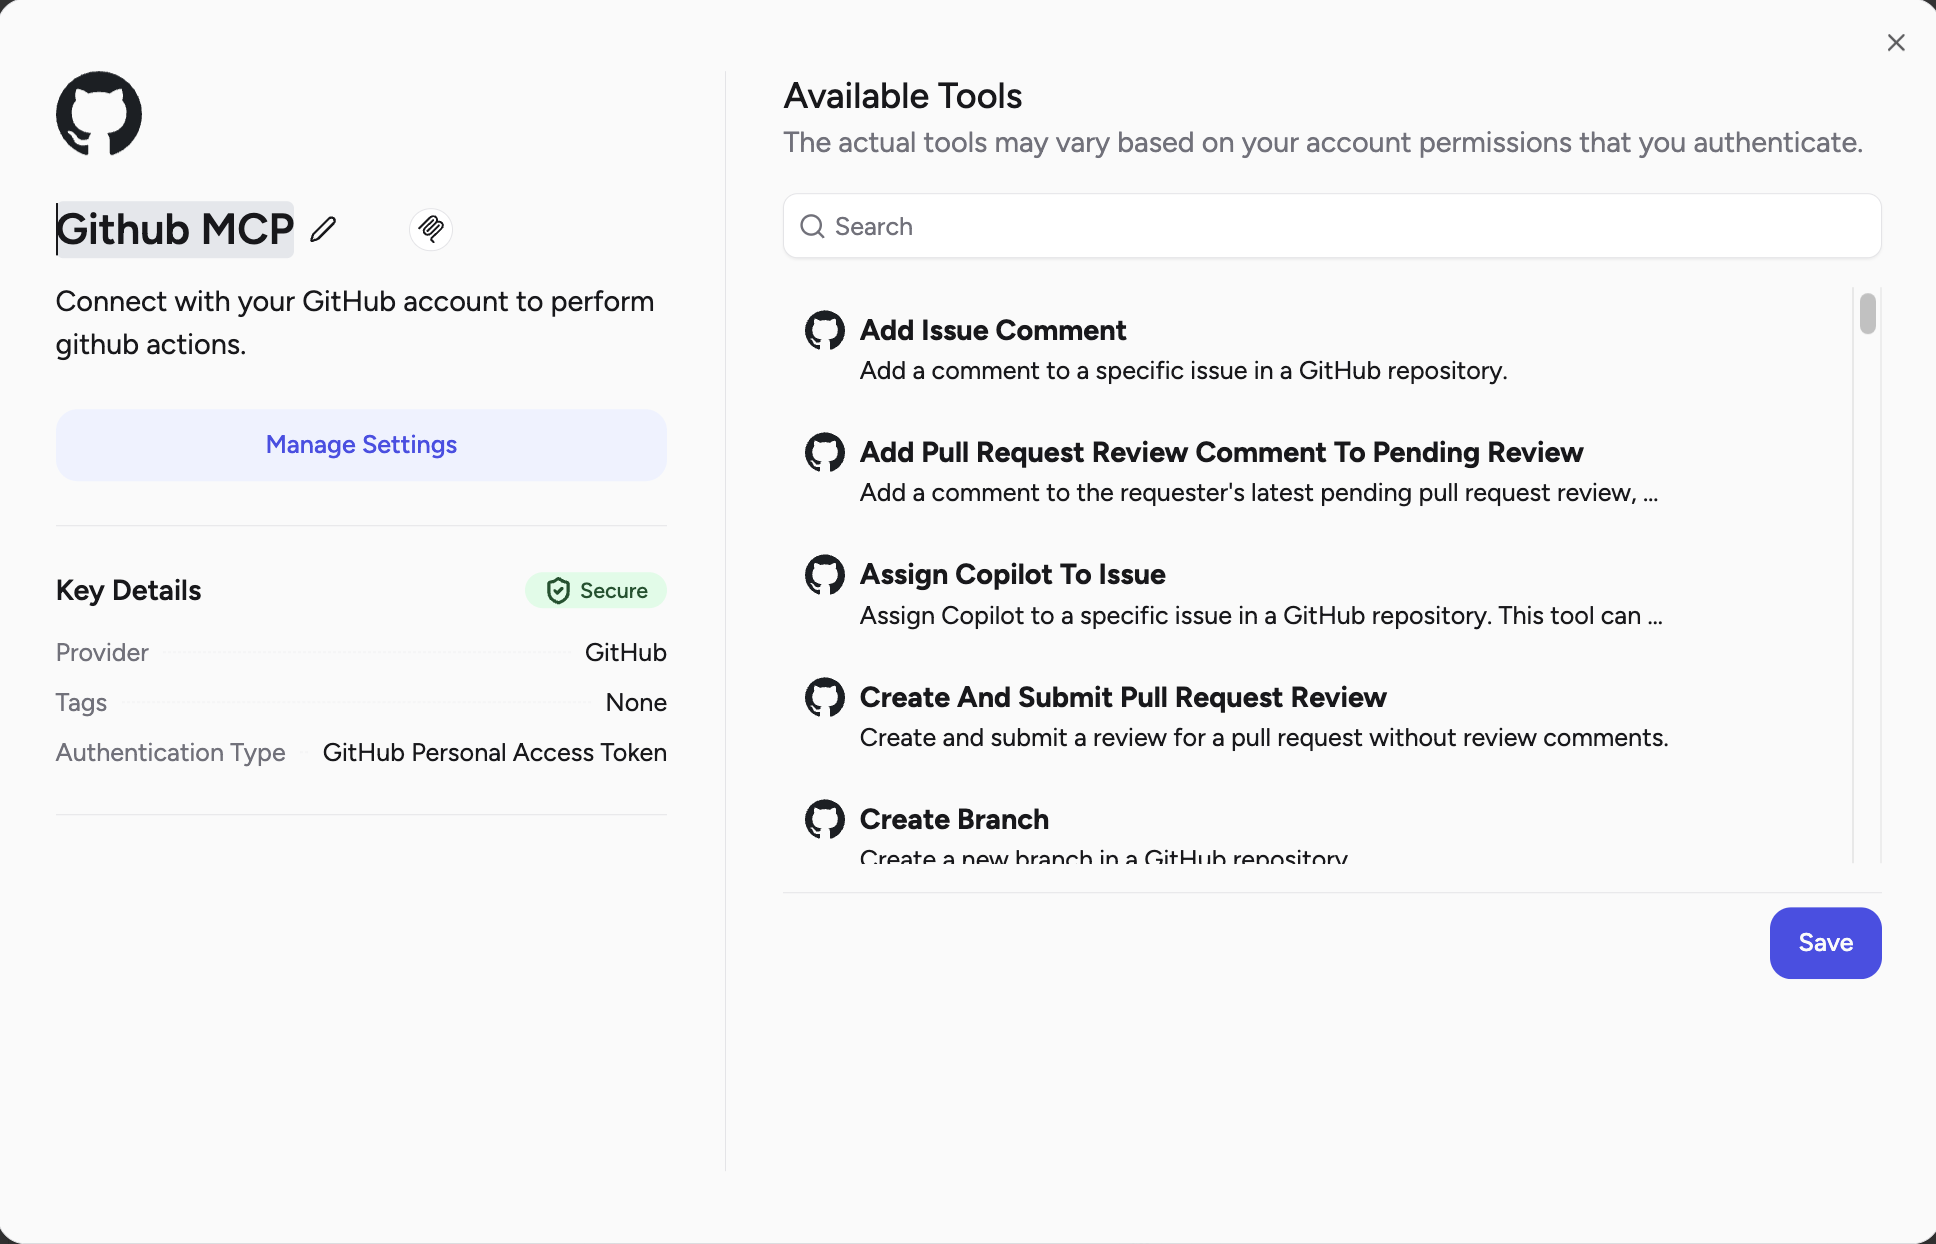
Select GitHub MCP
Navigate to the Tools library and select GitHub MCP.
-
Provide Authentication
Add the Personal Access Token to the GitHub MCP to add the tools you want to bring in.
-
Tool Discovery
The platform will automatically discover and configure the available GitHub tools based on your token permissions.
Once configured, your agents can interact with GitHub repositories and perform various operations based on the permissions granted through your Personal Access Token.