Setting Up Zapier MCP Server
-
Generate MCP Server URL
Navigate to mcp.zapier.com and access the Zapier MCP configuration page. -
Create New MCP Server
- Select New MCP Server → Other → Create MCP Server
- This will create a new MCP server instance for your Zapier integration
-
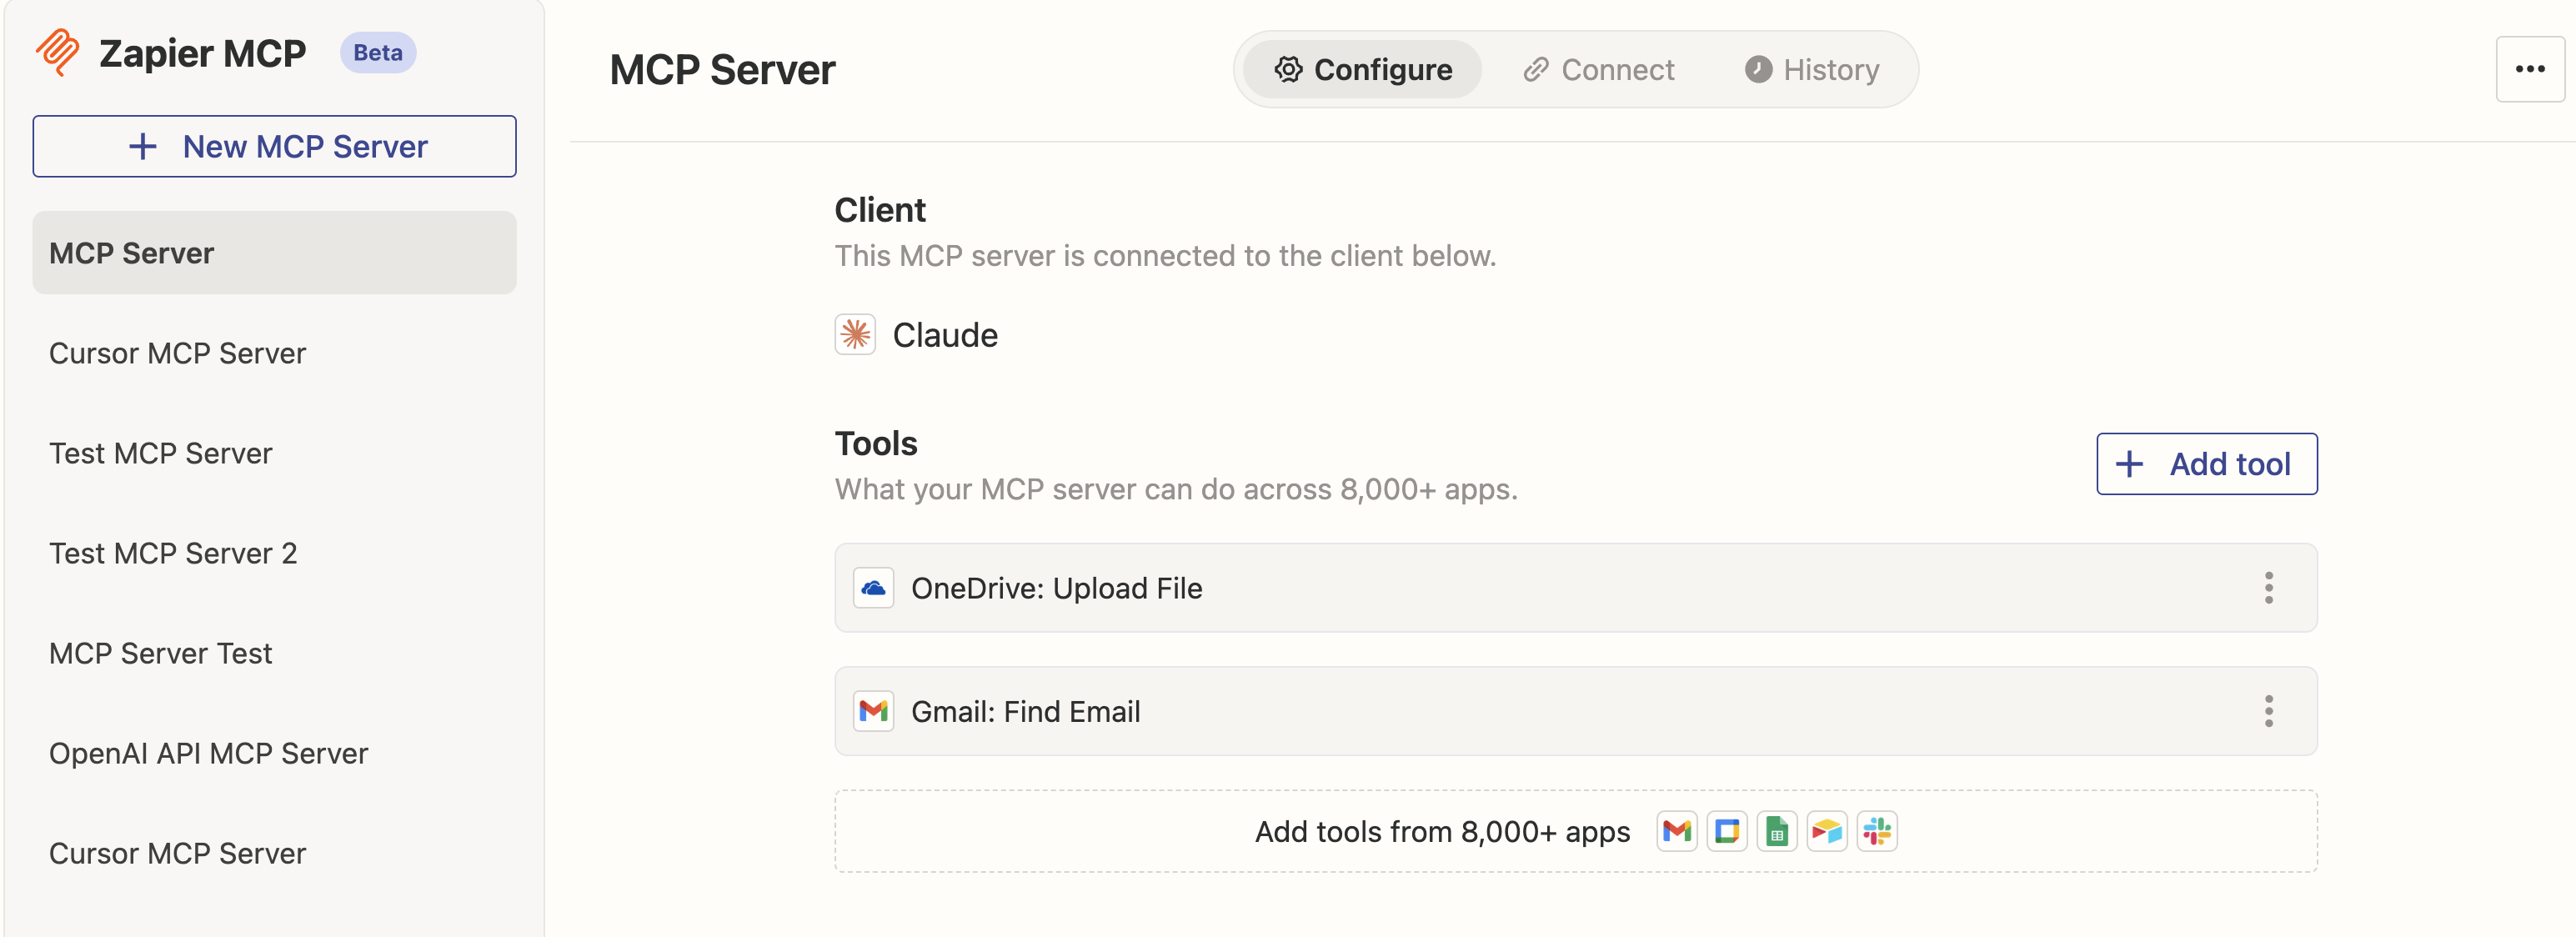
Add Tools to Your MCP Server
- Add the specific Zapier tools you want to include in your MCP Server
- Configure the tools according to your workflow requirements
- Select Connect when you’re ready to finalize the configuration
-
Copy the Server URL
- Once configured, copy the SSE Server URL provided by Zapier
- You’ll need this URL to connect to the MCP server from the Airia Platform
Adding Zapier MCP to Airia Platform
-
Select Zapier MCP
On the Airia Platform, navigate to the Tools library and select Zapier MCP. -
Provide Server URL
- Paste the SSE Server URL you copied from mcp.zapier.com
- Click Connect to discover the tools available from your Zapier MCP server
-
Tool Discovery
The platform will automatically discover and list all the tools available through your Zapier MCP server configuration.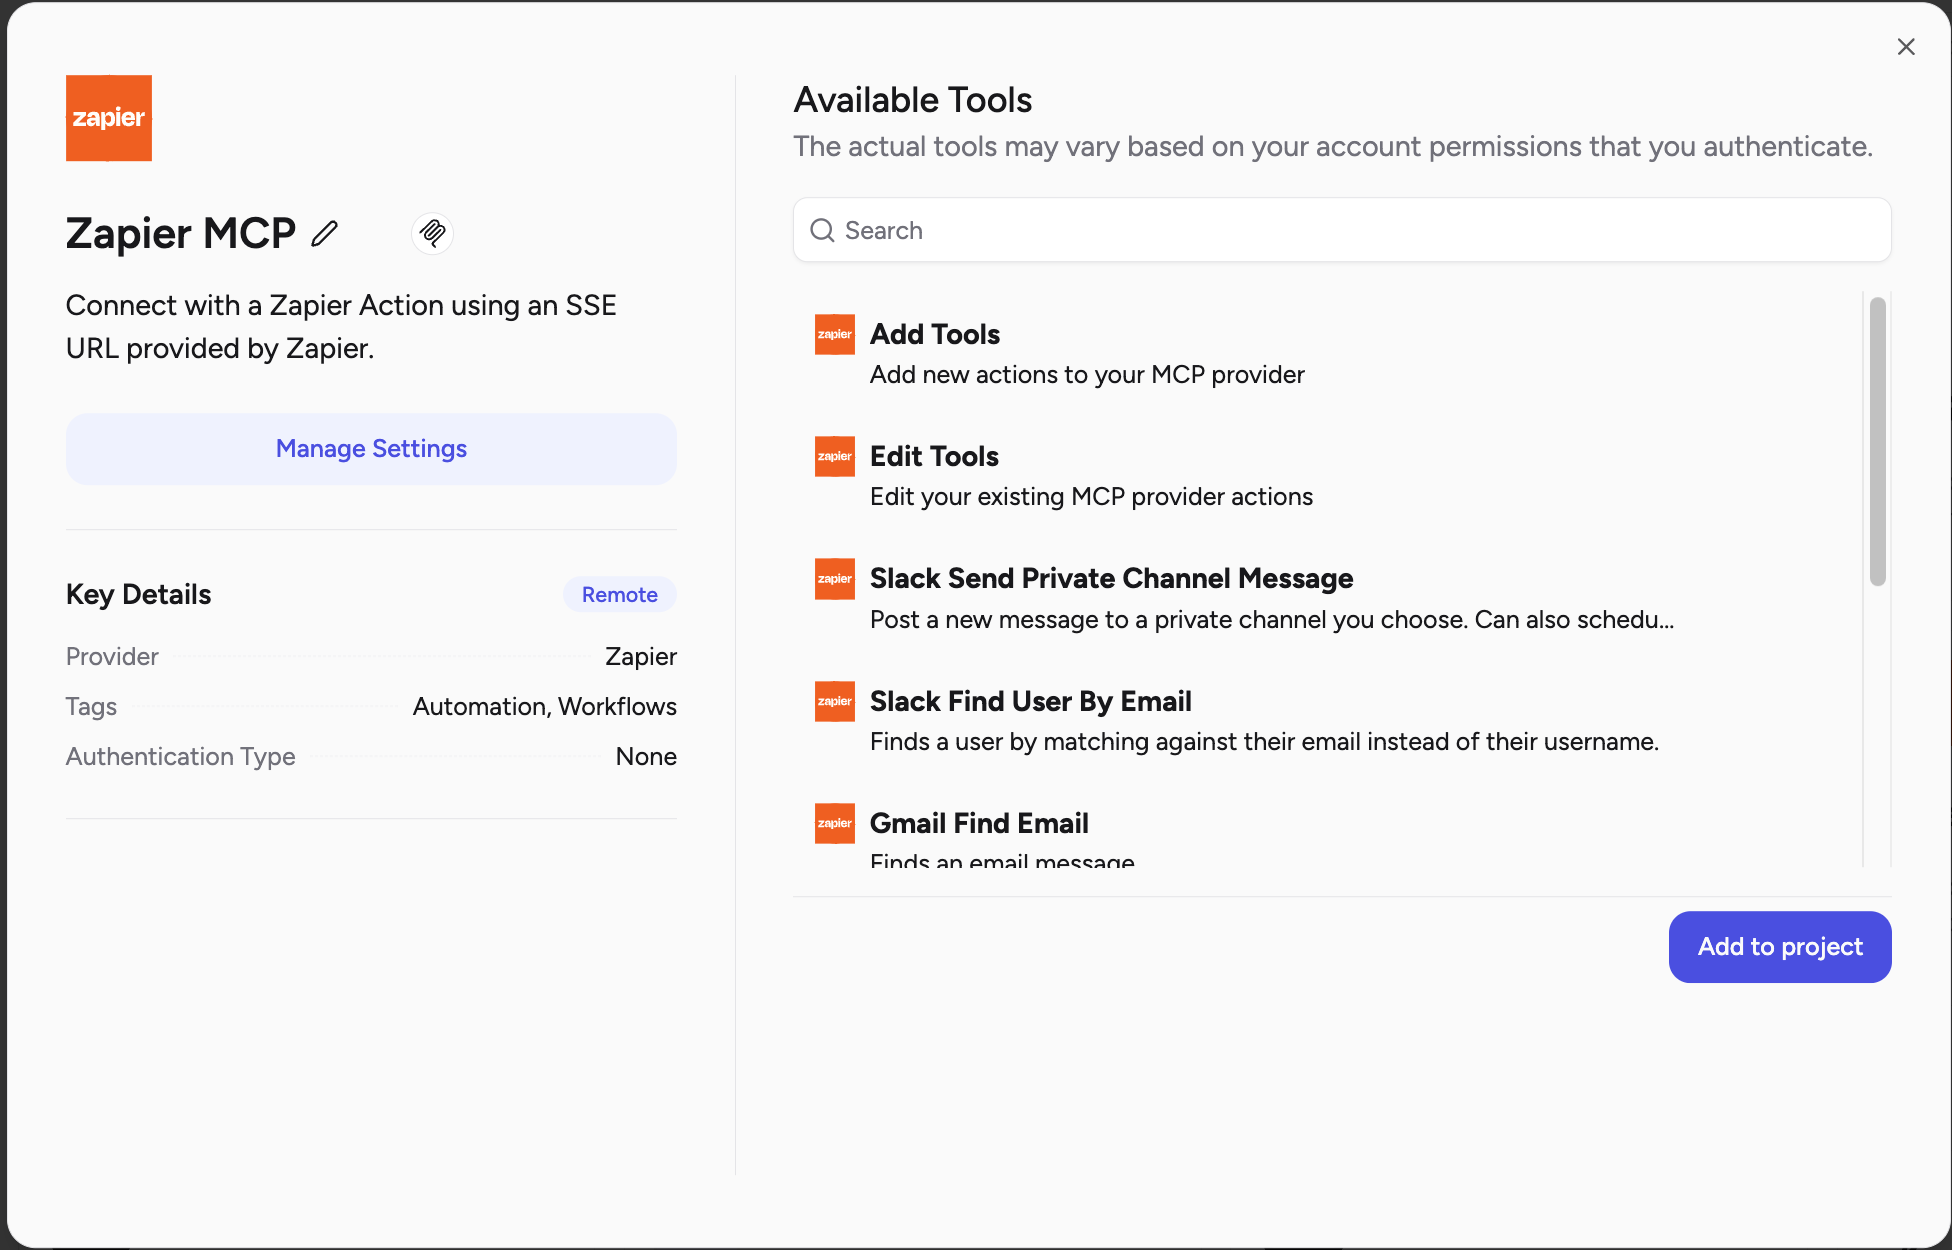
Using Zapier MCP Tools in Agents
Once added, these tools are available to use via the MCP Server in your Agent. Your agents can now access thousands of applications through Zapier’s extensive integration libraryThe Zapier MCP server provides access to Zapier’s full ecosystem of 5,000+ app integrations, enabling powerful automation workflows directly from your agents.